In this article, we are going to see how to configure SendGrid as an SMTP relay for the Metabase
If you are here I assume that you already are aware of Metabase and a little basics of SendGrid Mail service provider.
In Metabase, the SMTP server or Email Channel plays a crucial role as all the account creation and password resets are done directly through Emails. ( Once Email SMTP is enabled)
Email is essential in Metabase if you want to set alerts, schedule reports, dashboard subscriptions etc
Metabase provides great documentation on how to setup Email with SMTP credentials and covers various mail providers like AWS SES, Mandrill, GoogleApps etc ( as of 5 Jun 2024)
https://www.metabase.com/docs/latest/configuring-metabase/email
But they did not cover Sendgrid. this article will fill that gap and provide the future tech nomads seeking the same.
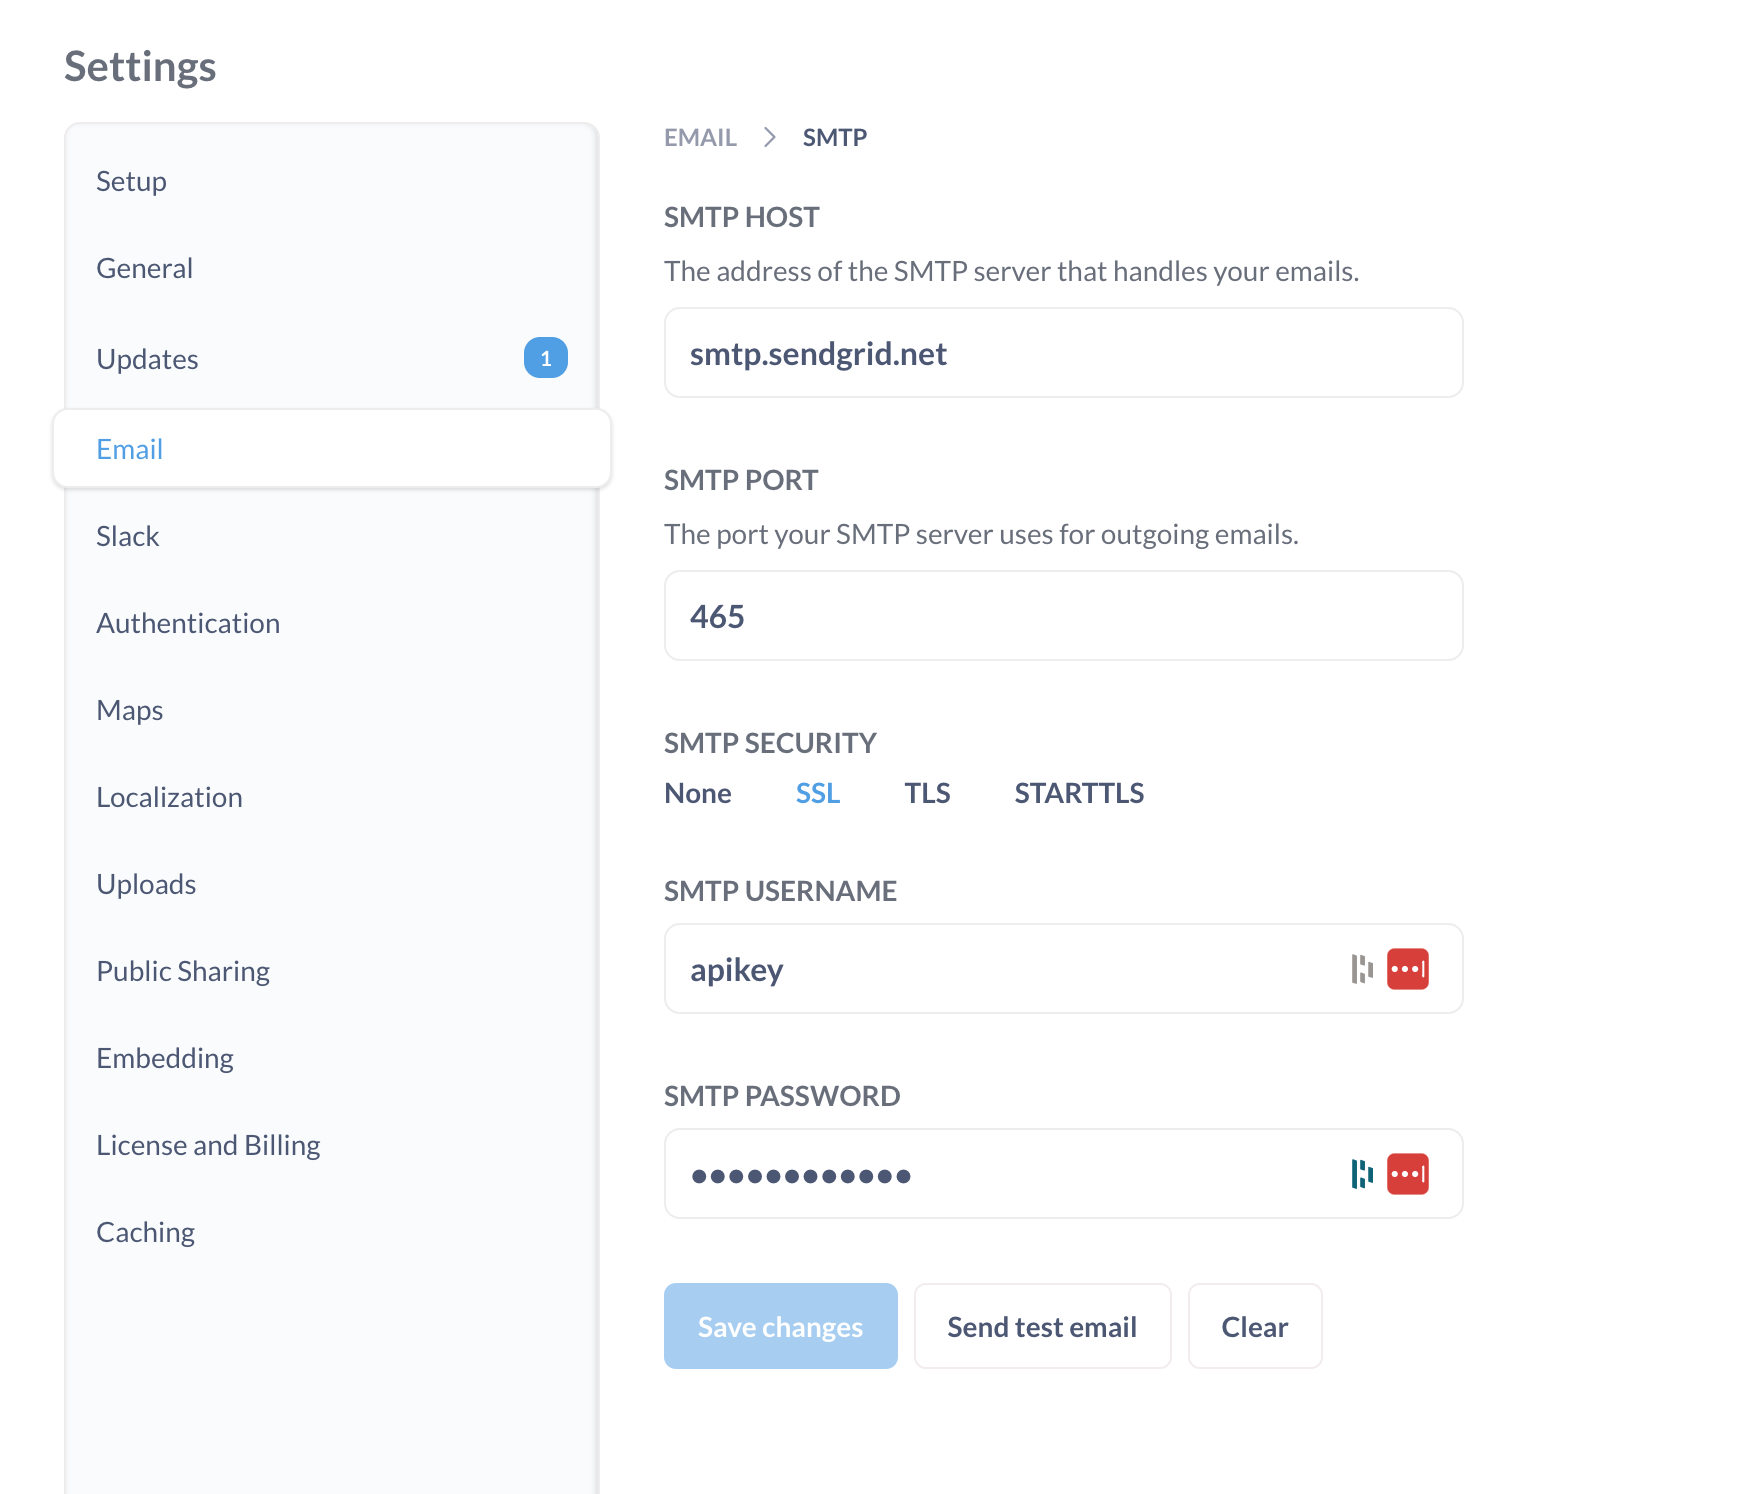
You need to fill in the following fields in Metabase to configure the SMTP Email server
- SMTP HOST: The address of the SMTP server that handles your emails.
- SMTP PORT: The port your SMTP server uses for outgoing emails.
- SMTP SECURITY:
- None
- SSL
- TLS
- STARTTLS
- SMTP Username.
- SMTP Password.
Here is a screenshot of what it looks like.
Let us see the necessary configuration setup to obtain all these credentials from sendgrid
How to get SMTP credentials from Sendgrid
Note*: You need to have SendGrid admin credentials or the necessary permission to do this configuration
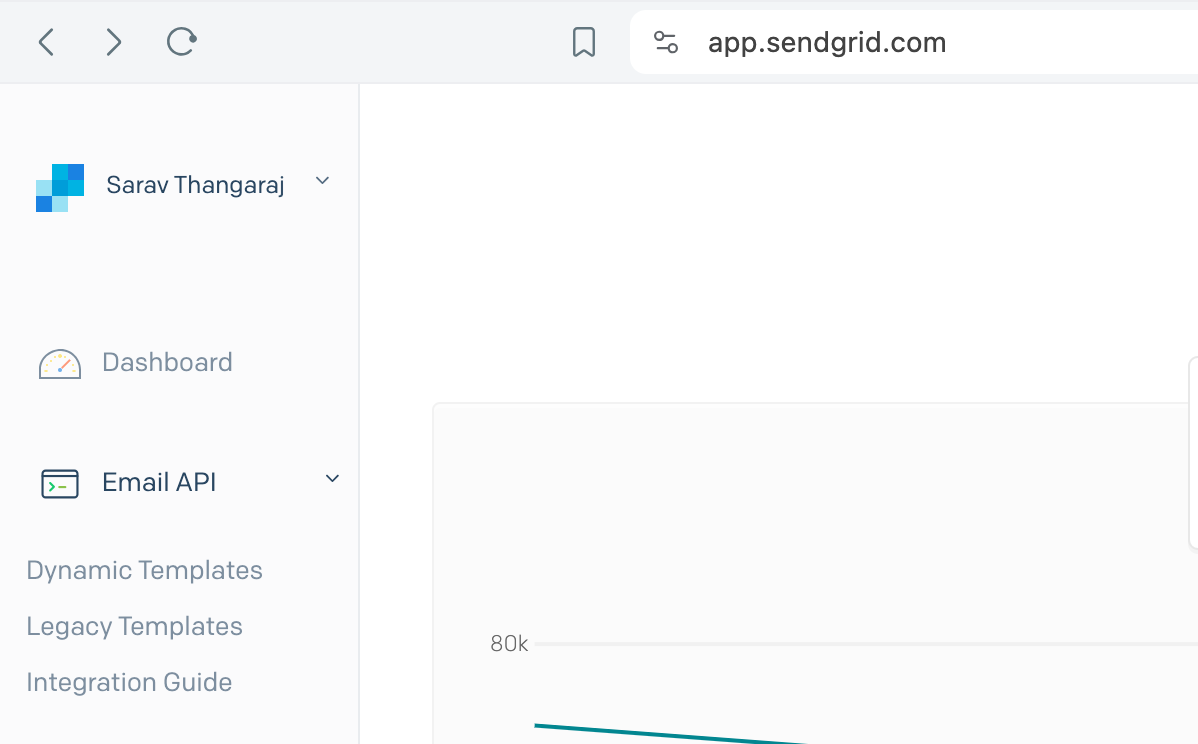
As you log in to the app.sendgrid.com, Go to the EmailAPI and Integration Guide
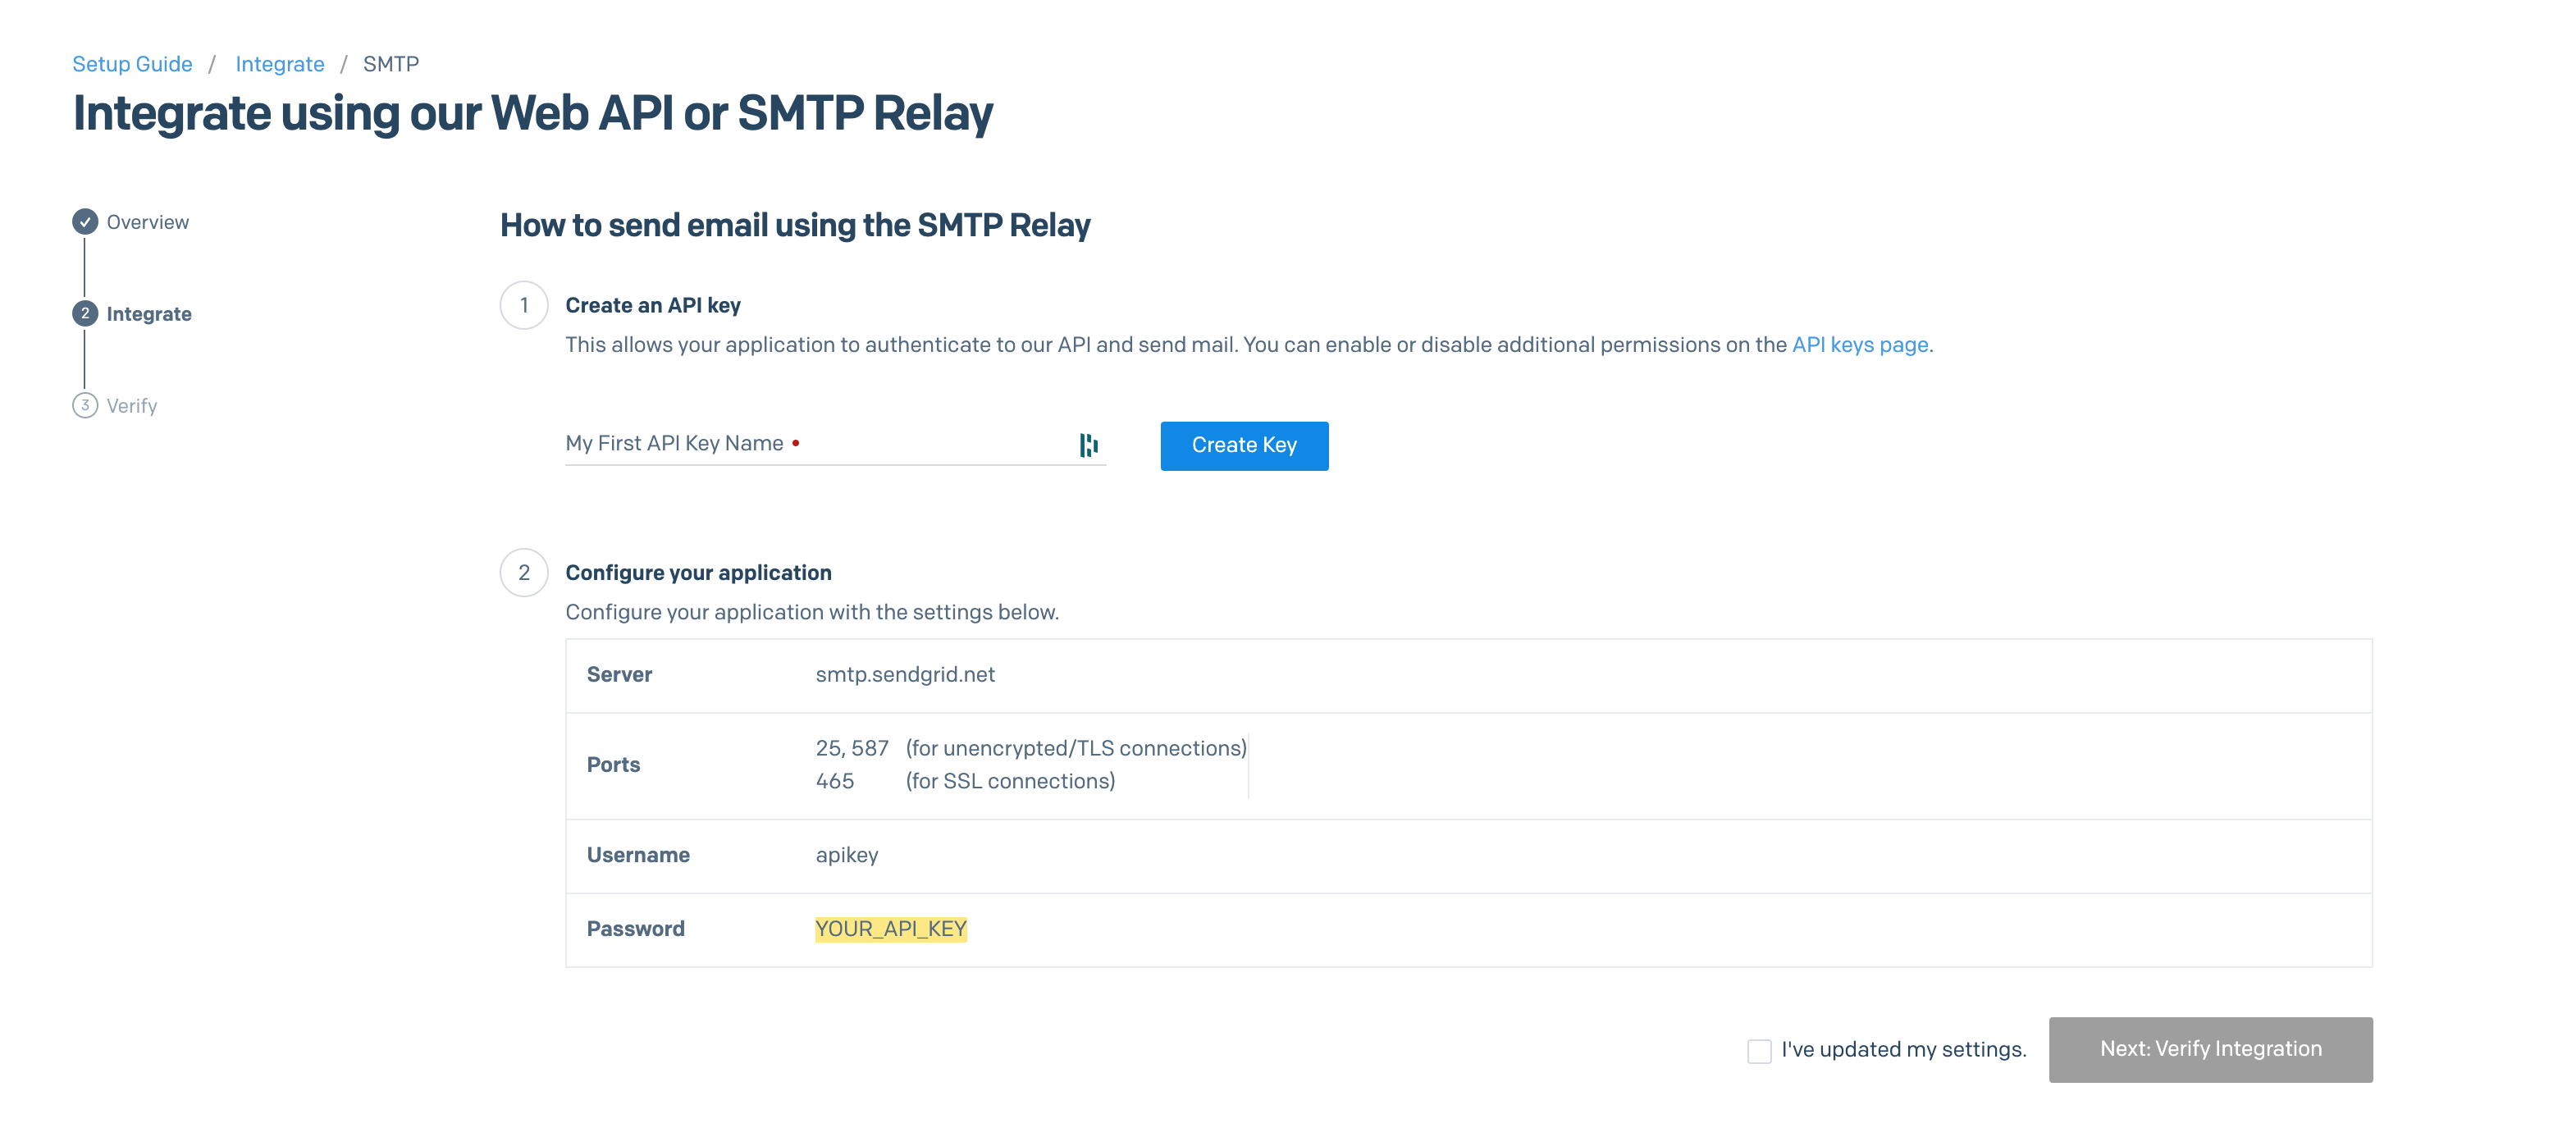
Under Integration Guide you will see two option one being SMTP relay choose that
In the next screen you will see the SMTP hostname, Port, username which is apikey
you can create an API key which happens to be your password, In this screen, enter some name for your key and click on Create Key
As you click on the create key, you will get your API key which is also your SMTP password.
That's it from Sendgrid. you now have everything you need for SMTP relay.
Now head back to Metabase fill in all the fields and send a test email and that's it. you are done.
Hope it helps
Cheers
Sarav AK

Follow me on Linkedin My Profile Follow DevopsJunction onFacebook orTwitter For more practical videos and tutorials. Subscribe to our channel
Signup for Exclusive "Subscriber-only" Content


