In this article, we are going to see how you can deploy your simple python application to AWS Lambda and access it publically using an Application Load balancer.
Lambda is a great feature from AWS to host your source code without having to worry about setting up server infrastructure.
It is also scalable and production-grade, so you do not need to worry about making your application production-ready.
Just simply write your code and deploy it as a service and share the public URL.
The whole objective of this article is to host a simple python3 program and make it available as a web service.
Let's go ahead.
Python Source code to Deploy to Lambda Function
Here is the python source code we are going to deploy as an AWS Lambda function
import random
import string
import re
max=8
password=''.join(random.choices(string.ascii_lowercase+string.ascii_uppercase, k=max))
mandatory=''.join(''.join(random.choices(choice)) for choice in [string.ascii_lowercase, string.ascii_uppercase, "_@", string.digits])
passwordlist=list(password+mandatory)
random.shuffle(passwordlist)
while re.match("^[0-9]|@|_",''.join(list(passwordlist))) != None:
    random.shuffle(passwordlist)
    passwordlist=list(password+mandatory)
print(''.join(list(passwordlist)))
you can see this is a simple code to create some random Passwords using the random.choice and some logic around it.
Let us see first how this program works offline.
Every time you launch this program you get a random password that's all it does.
Now let us think about how we can host this into Lambda function.
As we are moving forward to the AWS Lambda function creation and deployment. We presume that you have sufficient privileges to create Lambda and ALB
Creating Lamda Function
It is really simple to create your Lambda function.
Go to AWS Lambda service page on AWS Management console
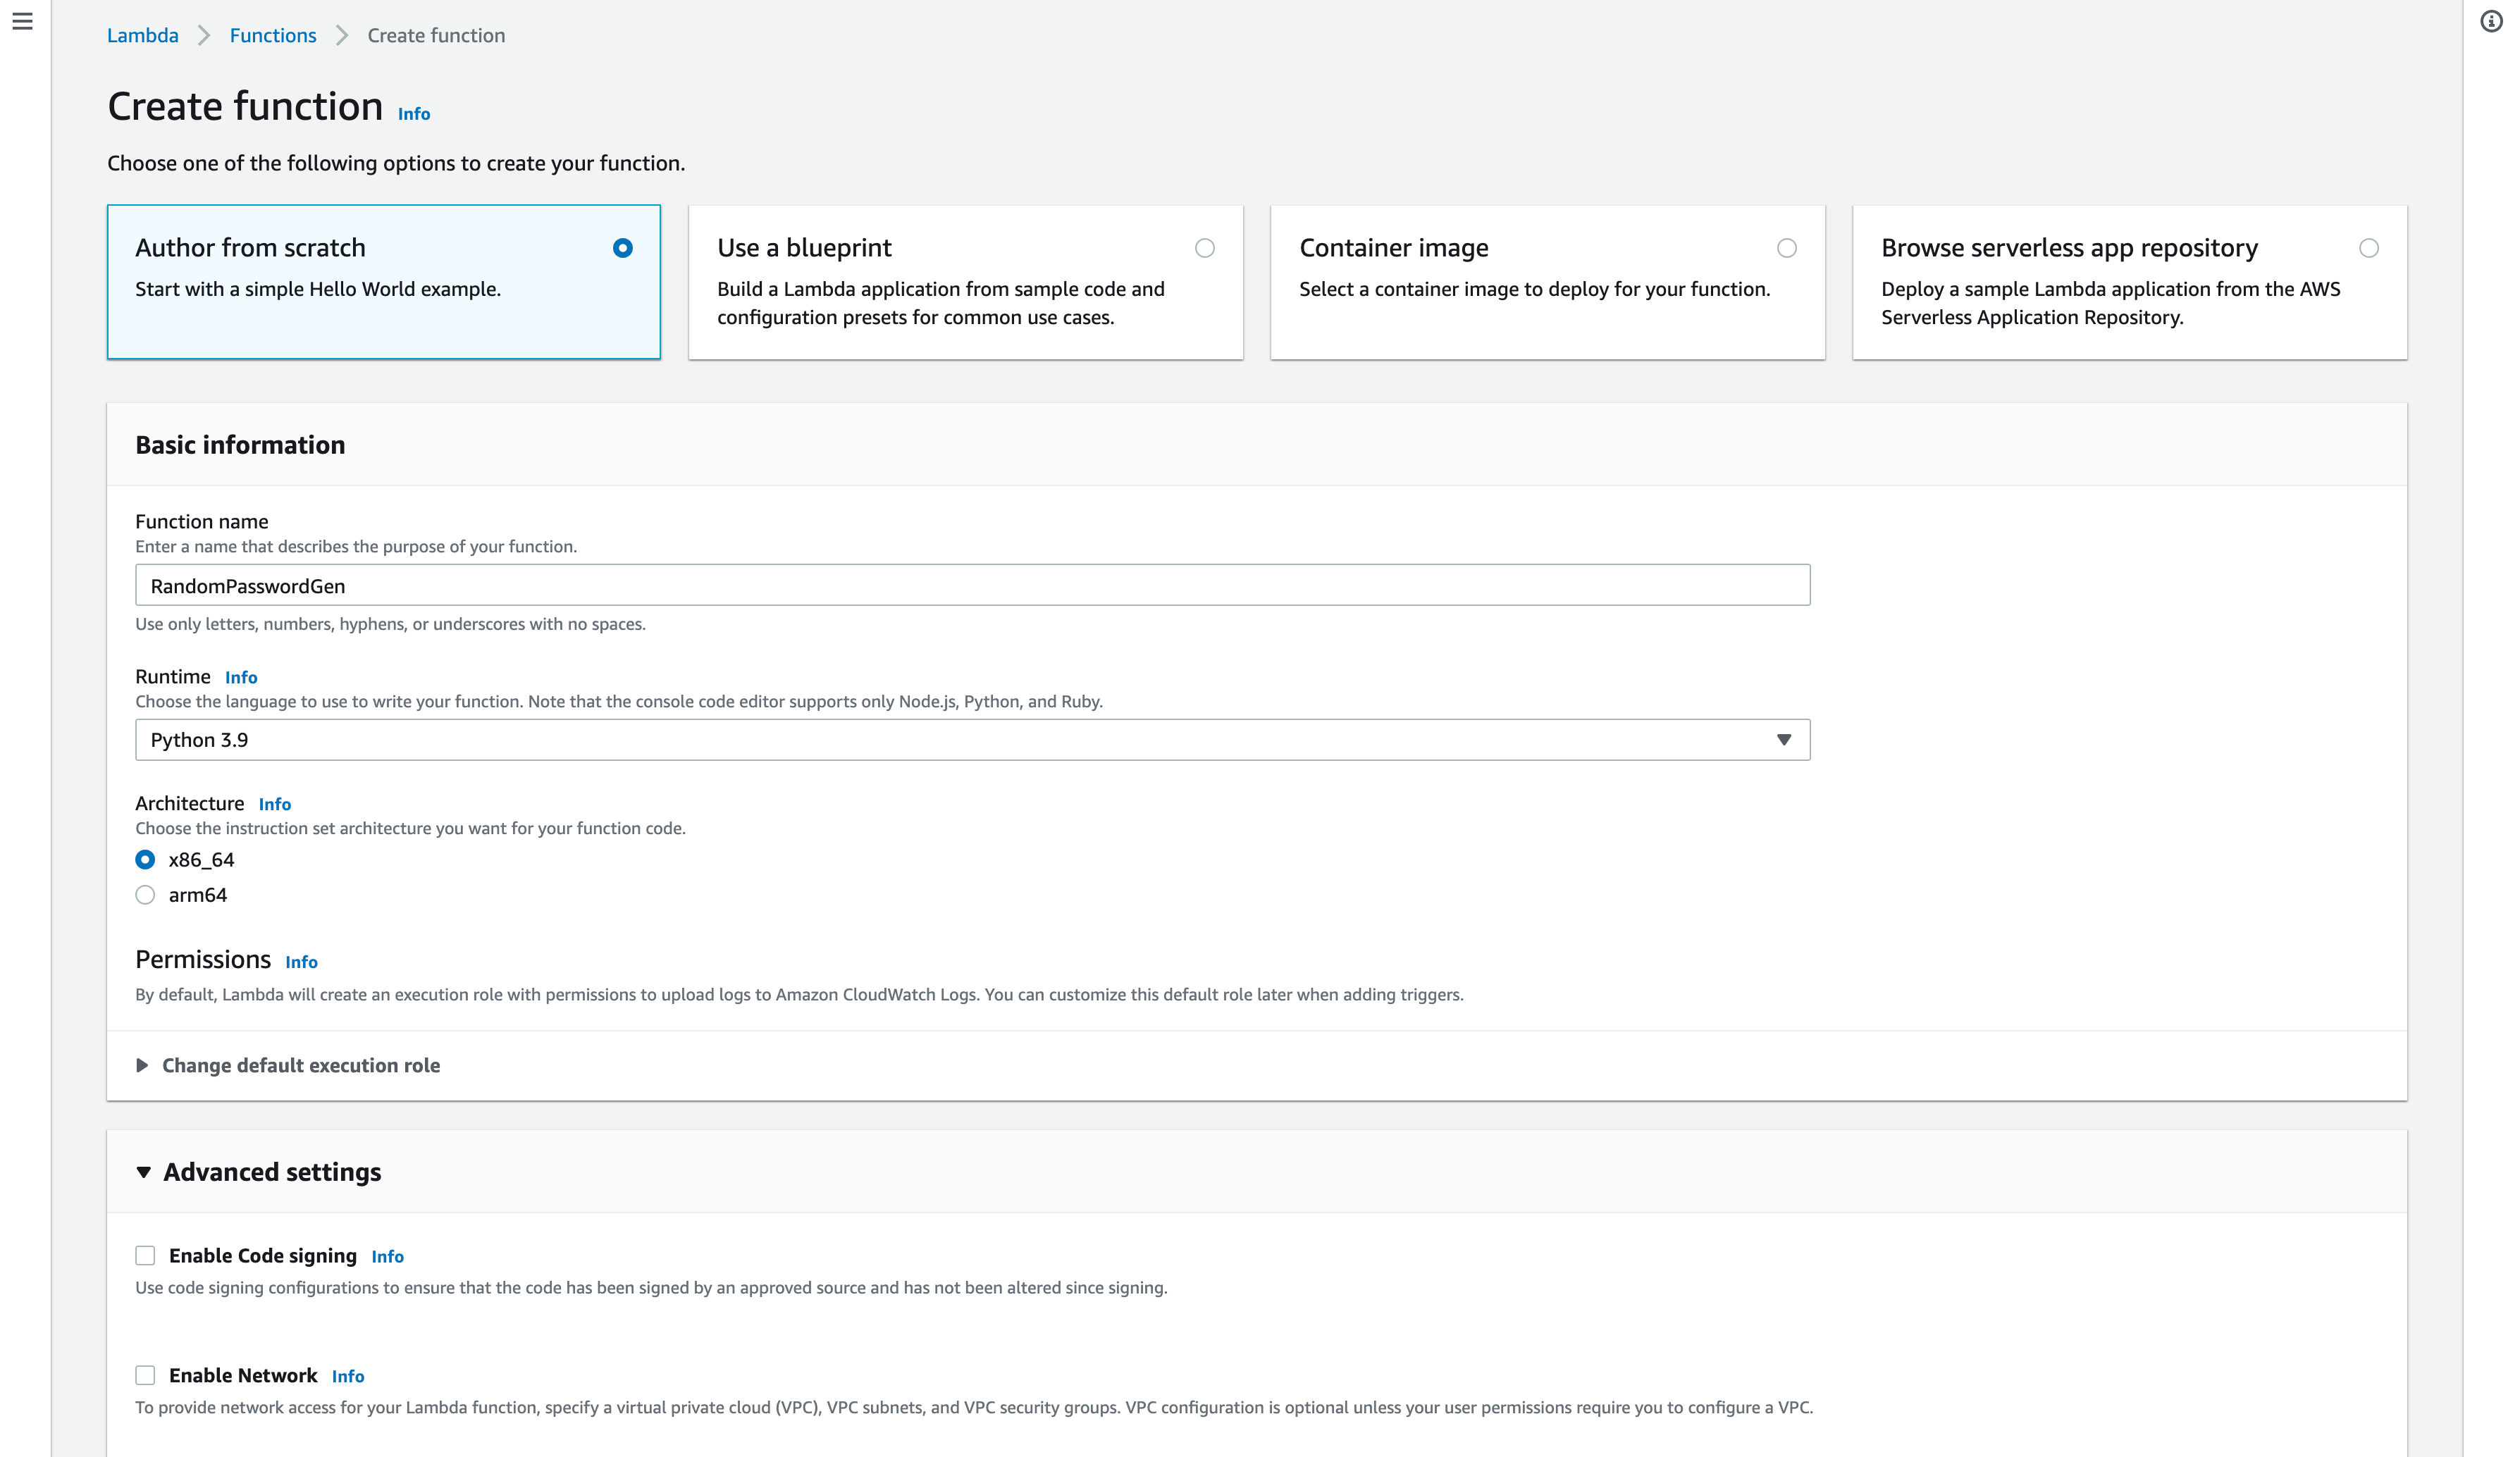
Click on the Create Function button, On the Create Function page.
Choose the Author From Scratch choice box and continue ( this is default option)
Enter the Function name and choose the Runtime as Python 3.9 let the architecture be X86_64 or you can choose arm too based on your preference
By default, AWS Lambda creates the necessary IAM roles for Lambda to write and read contents from S3.
Despite, AWS Lambda being a serverless implementation, we need to store our codebase somewhere and Lambda uses S3 for the same.
Every release/deployment create different versions and is managed on S3. to simply put, S3 is the filesystem and disk space of Lambda.
If you expand the Change default execution role you can see that it create a new role with basic Lambda permissions.
You can choose to use an existing IAM role If you already have one.
Click now on the Creation Function button on the bottom of the screen and the new function would be created with some boilerplate code
Deploy your python code into the Lambda function
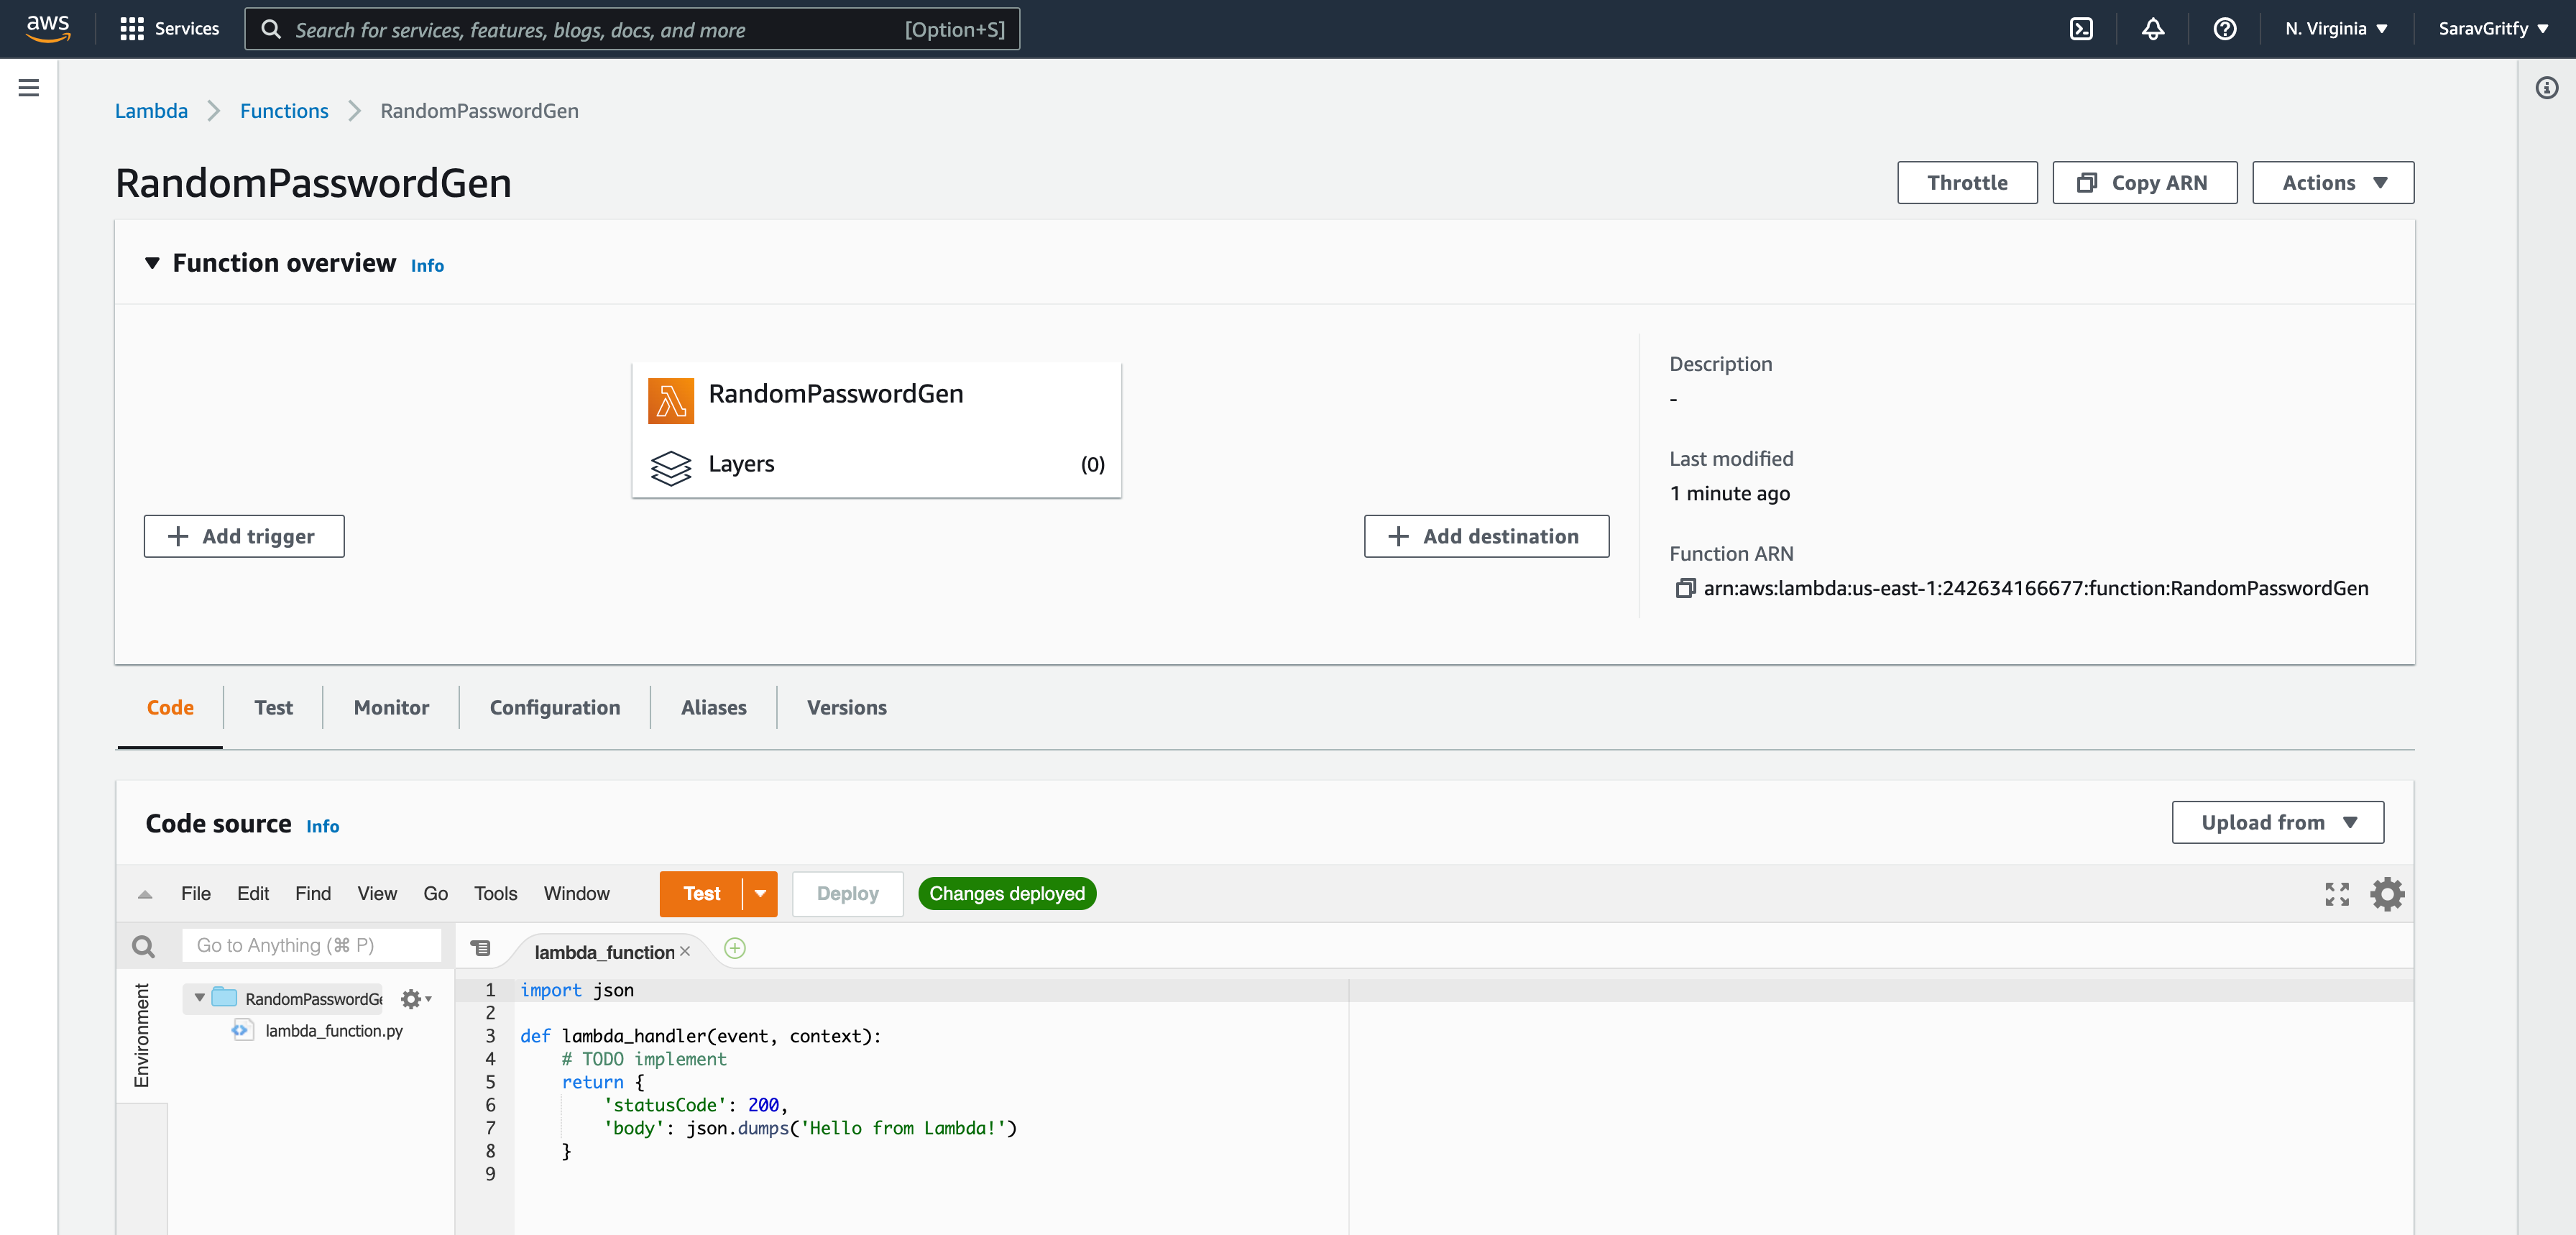
By default, you would have a python file created with the name lambda_function.py with some basic code to return 200 response and some message
import json

def lambda_handler(event, context):
    # TODO implement
    return {
        'statusCode': 200,
        'body': json.dumps('Hello from Lambda!')
    }
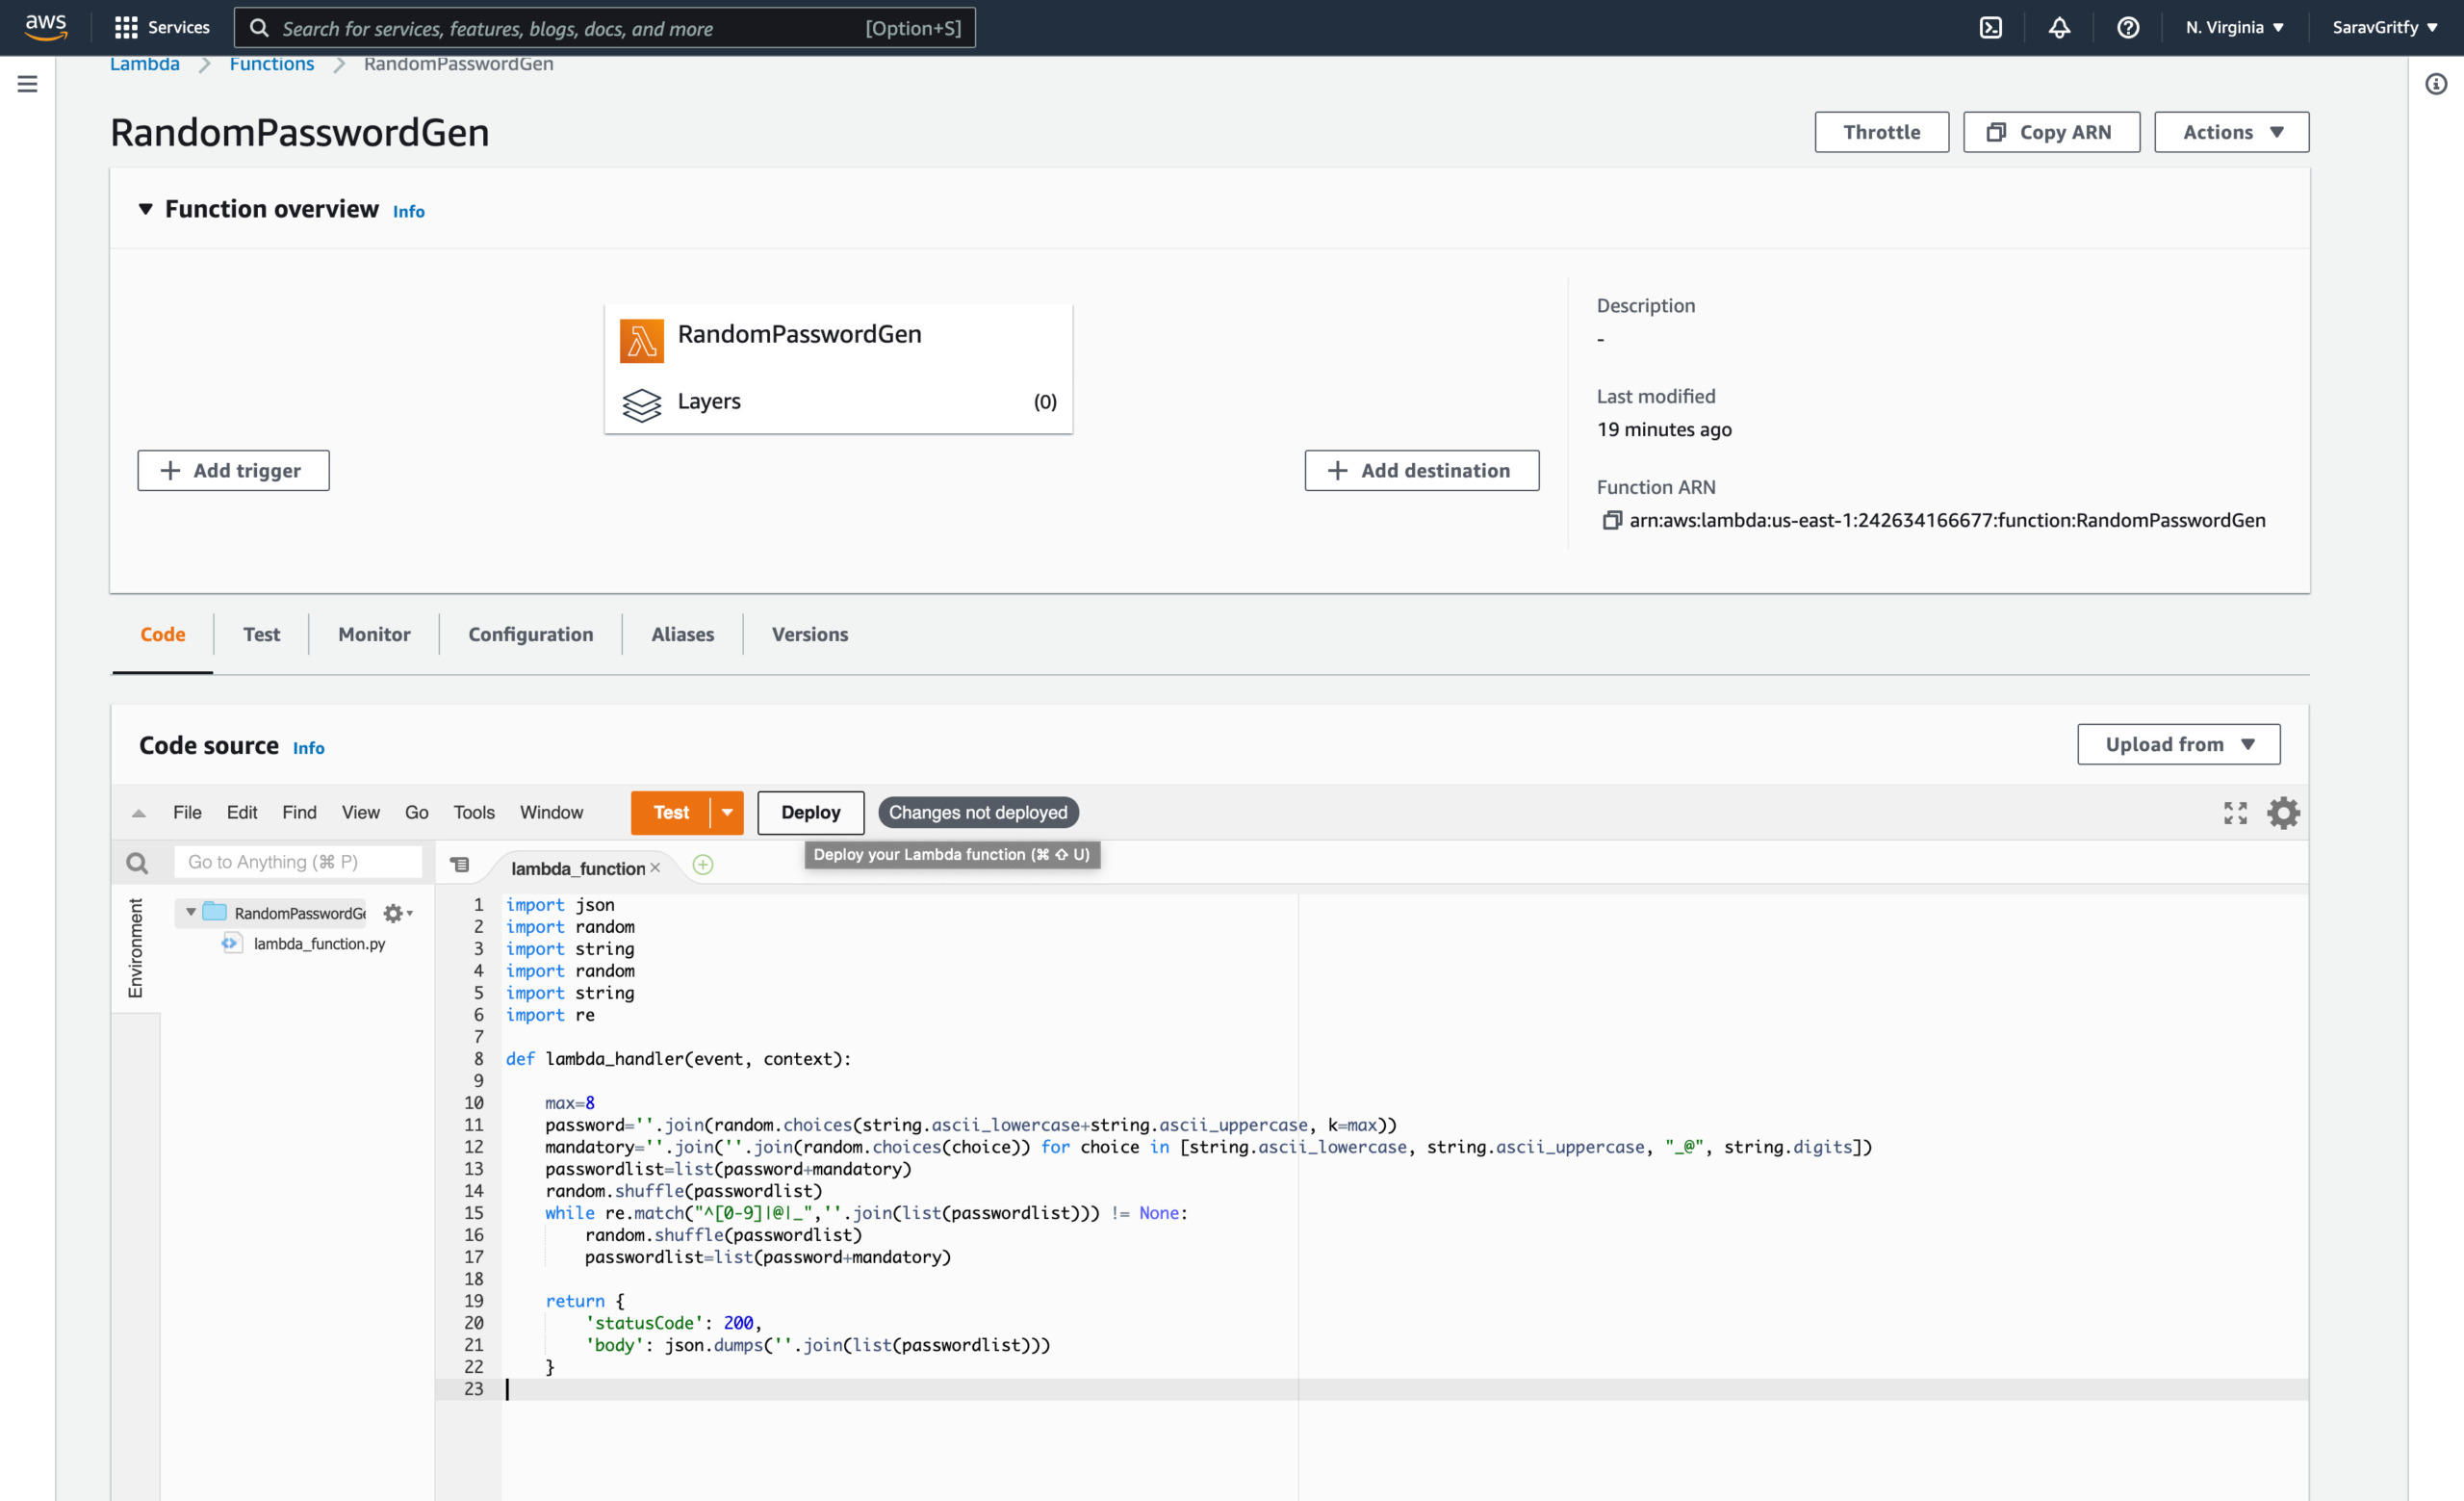
here you can just replace the #TODO Implement section/string with our actual code along with a few imports ( Please mind the indentation if you are manually updating)
Or simply replace the content with the following
import json
import random
import string
import random
import string
import re

def lambda_handler(event, context):

    max=8
    password=''.join(random.choices(string.ascii_lowercase+string.ascii_uppercase, k=max))
    mandatory=''.join(''.join(random.choices(choice)) for choice in [string.ascii_lowercase, string.ascii_uppercase, "_@", string.digits])
    passwordlist=list(password+mandatory)
    random.shuffle(passwordlist)
    while re.match("^[0-9]|@|_",''.join(list(passwordlist))) != None:
        random.shuffle(passwordlist)
        passwordlist=list(password+mandatory)

    return {
        'statusCode': 200,
        'body': json.dumps(''.join(list(passwordlist)))
    }
After updating the code. Click on the Deploy button to deploy your changes
You would see the Changes not deployed turns green with the message Changes deployed
As you might already know, the Lambda function cannot be tested publically without any frontend. Cause it is designed to be triggered by some edge component
It can be
- Application Load balancer
- API Gateway
- Another Lambda function
- EC2 instance
- Any other AWS service etc.
there is a reason why we are highlighting this now.
So we have a function now, how are we going to test it.
Test your Lambda function
So to test your Lambda function, there is a built-in feature right there.
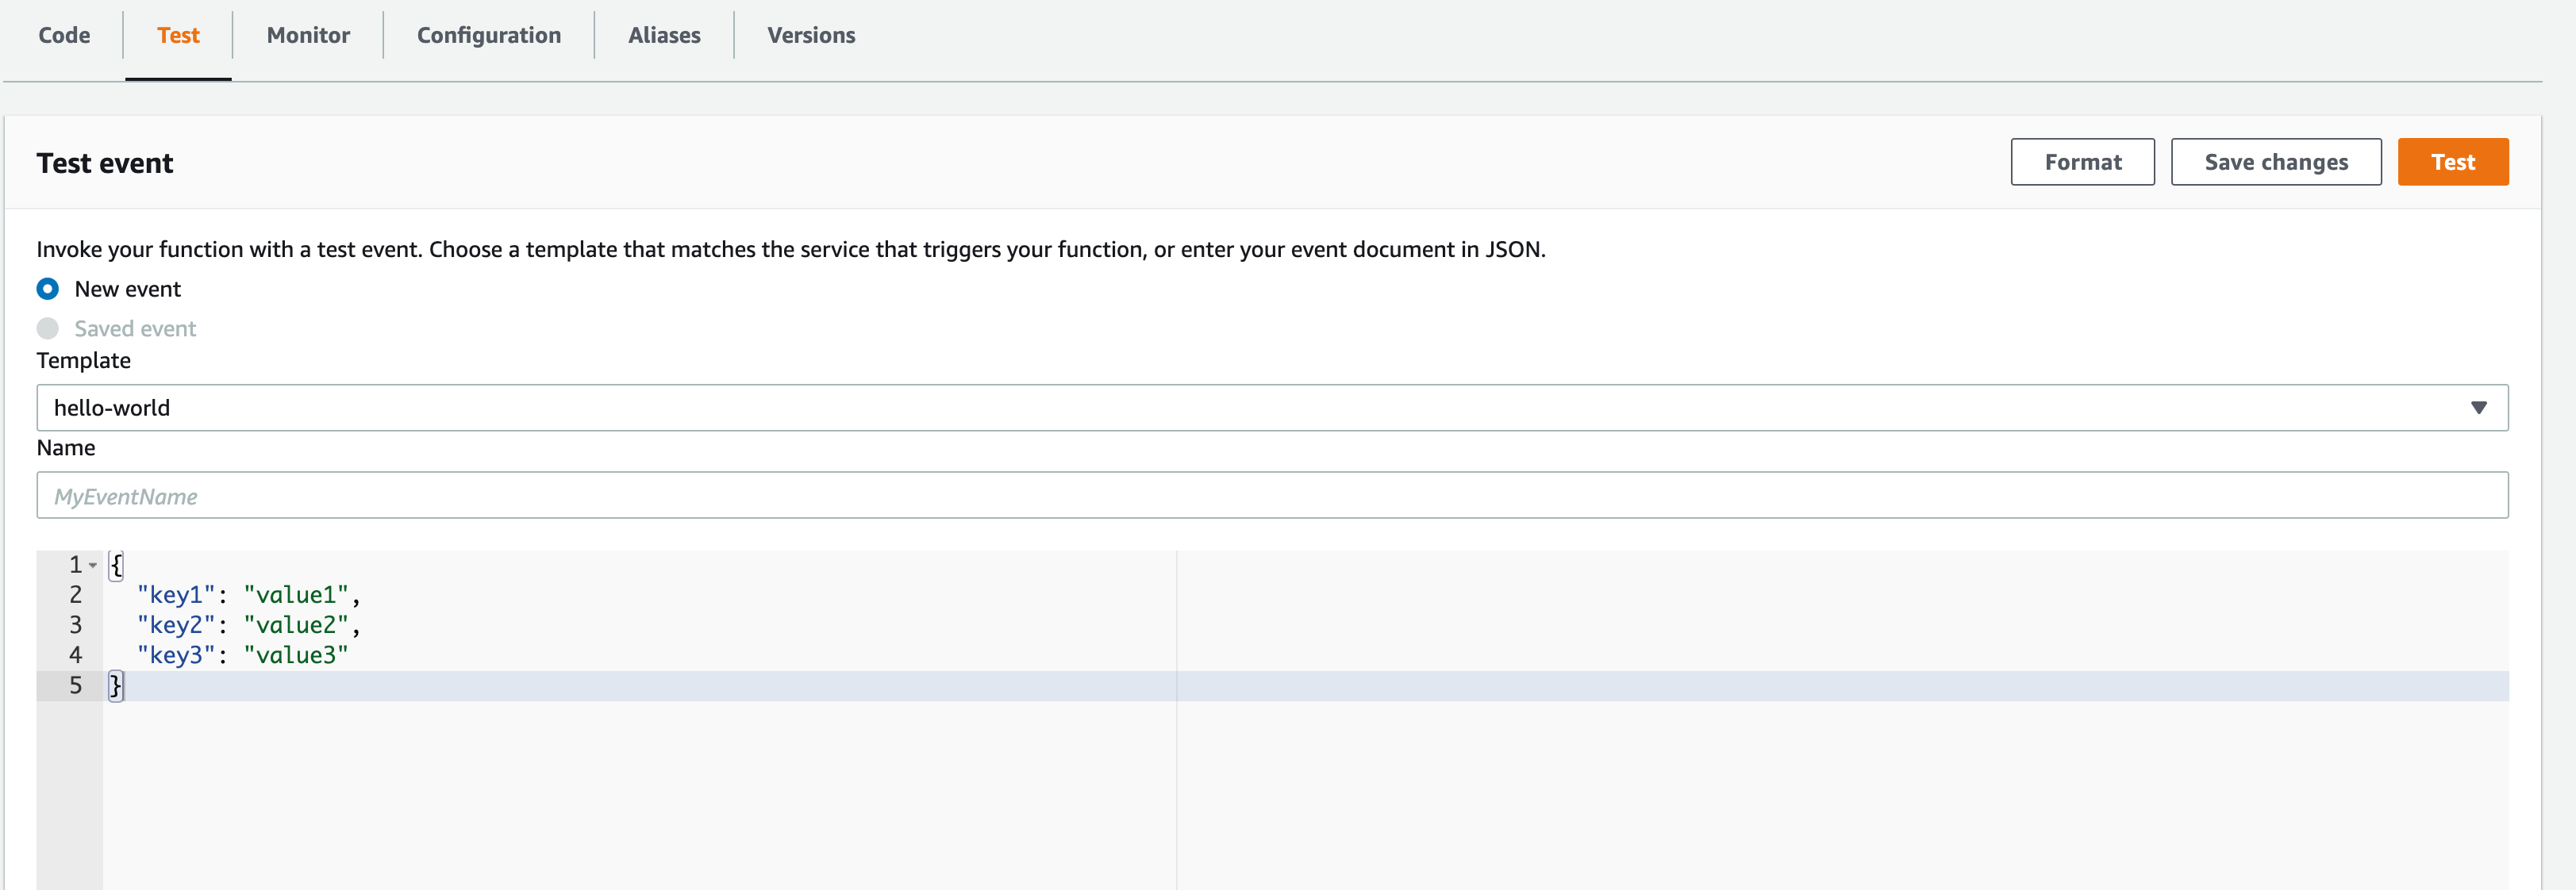
Just switch to the Test tab from the code tab that you are currently in
Since this is a simple function and it does not need any data from the invoking origin or trigger. you do not have to configure anything.
Just click on the Test button.
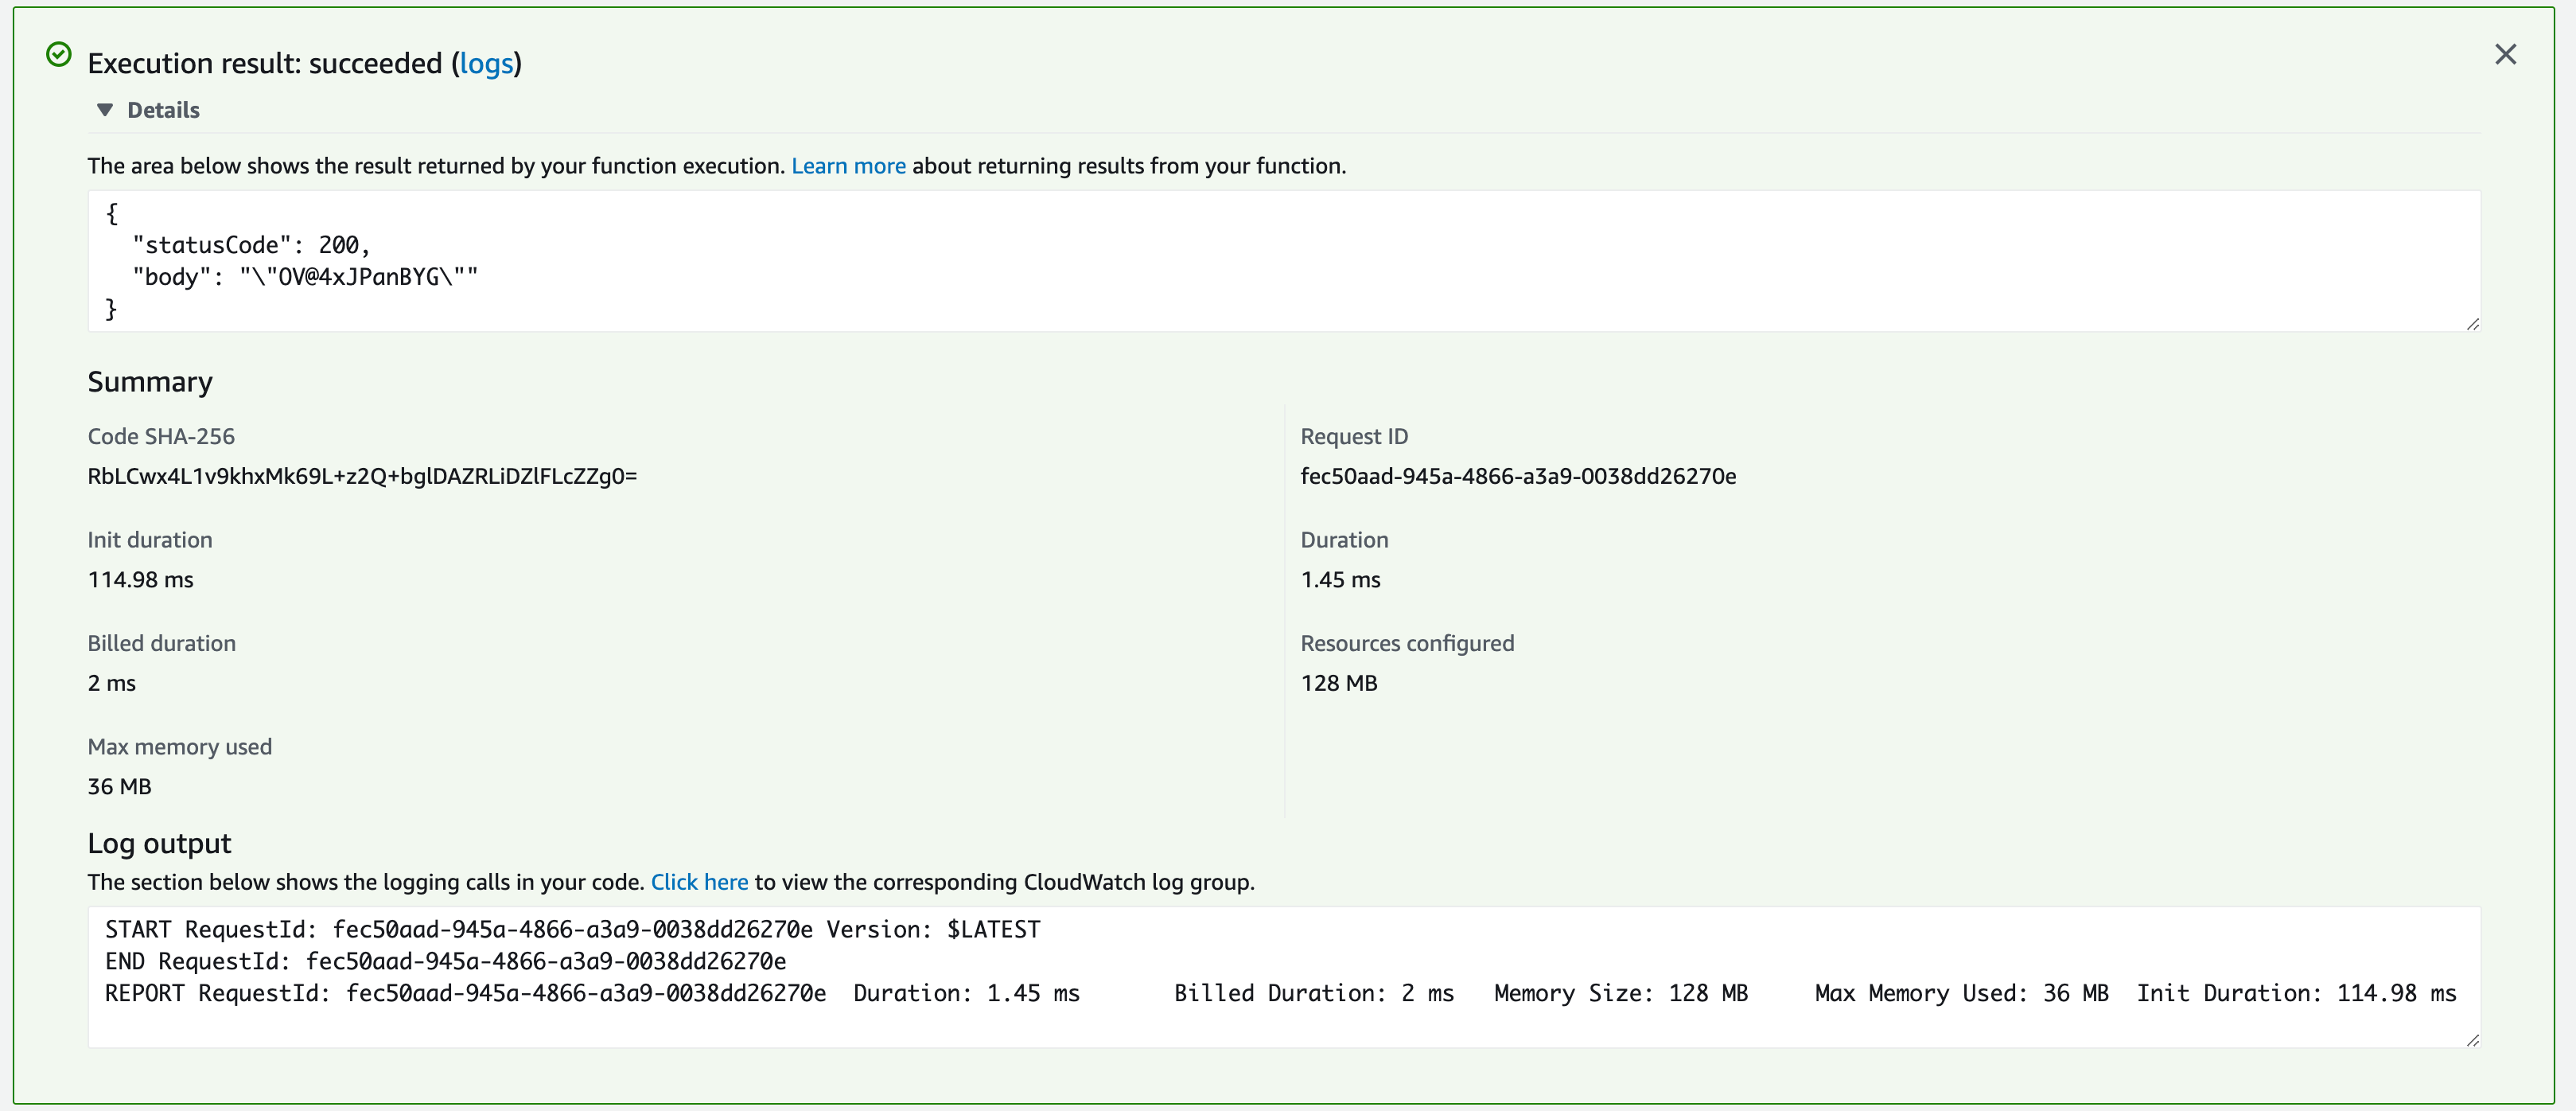
you would see your execution output comes as a Message box right in there
If you look closely you can see that the body contains the Random password string that our function has generated.
Publish Lambda Function with Application Load Balancer
Now we have locally tested it but it cannot be used publically yet, as I have mentioned AWS Lambda functions should have a trigger in front.
In our case Application Load balancer.
So now we need to create an Application Load Balancer and a Target group and connect to our Lambda function
- Go to EC2 - LoadBalancers
- Click on the
CreateLoadBalancerbutton - Choose the Load Balancer type as
Application Load Balancer
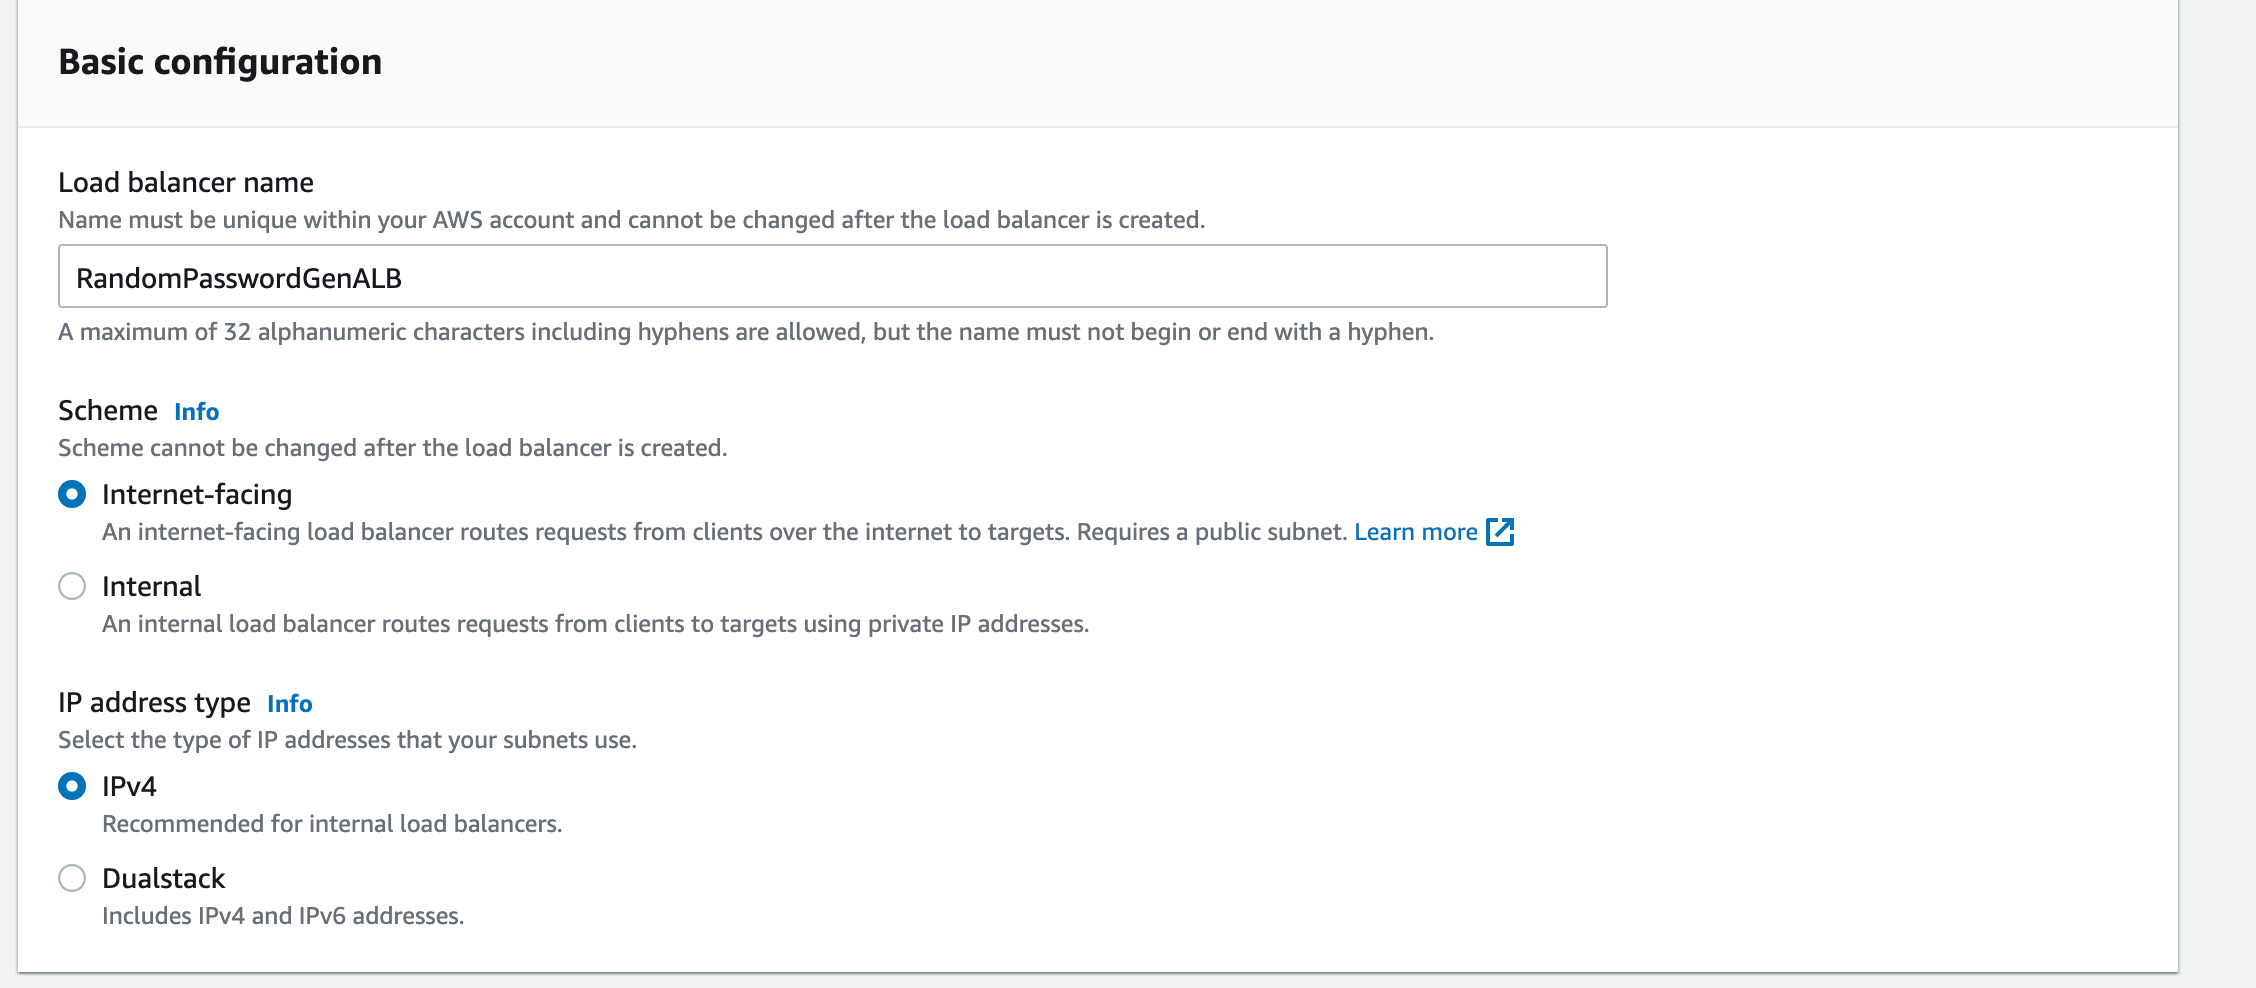
Enter the Load Balancer Name of your choice
Choose the Internet Facing as the scheme as we want this ALB to be public.
Assign a VPC and the Subnets for your Load Balancer. ( you need to have at least two subnets)
Despite ALB being public it is still part of your VPC and needs your subnet IPs to connect to the Target group
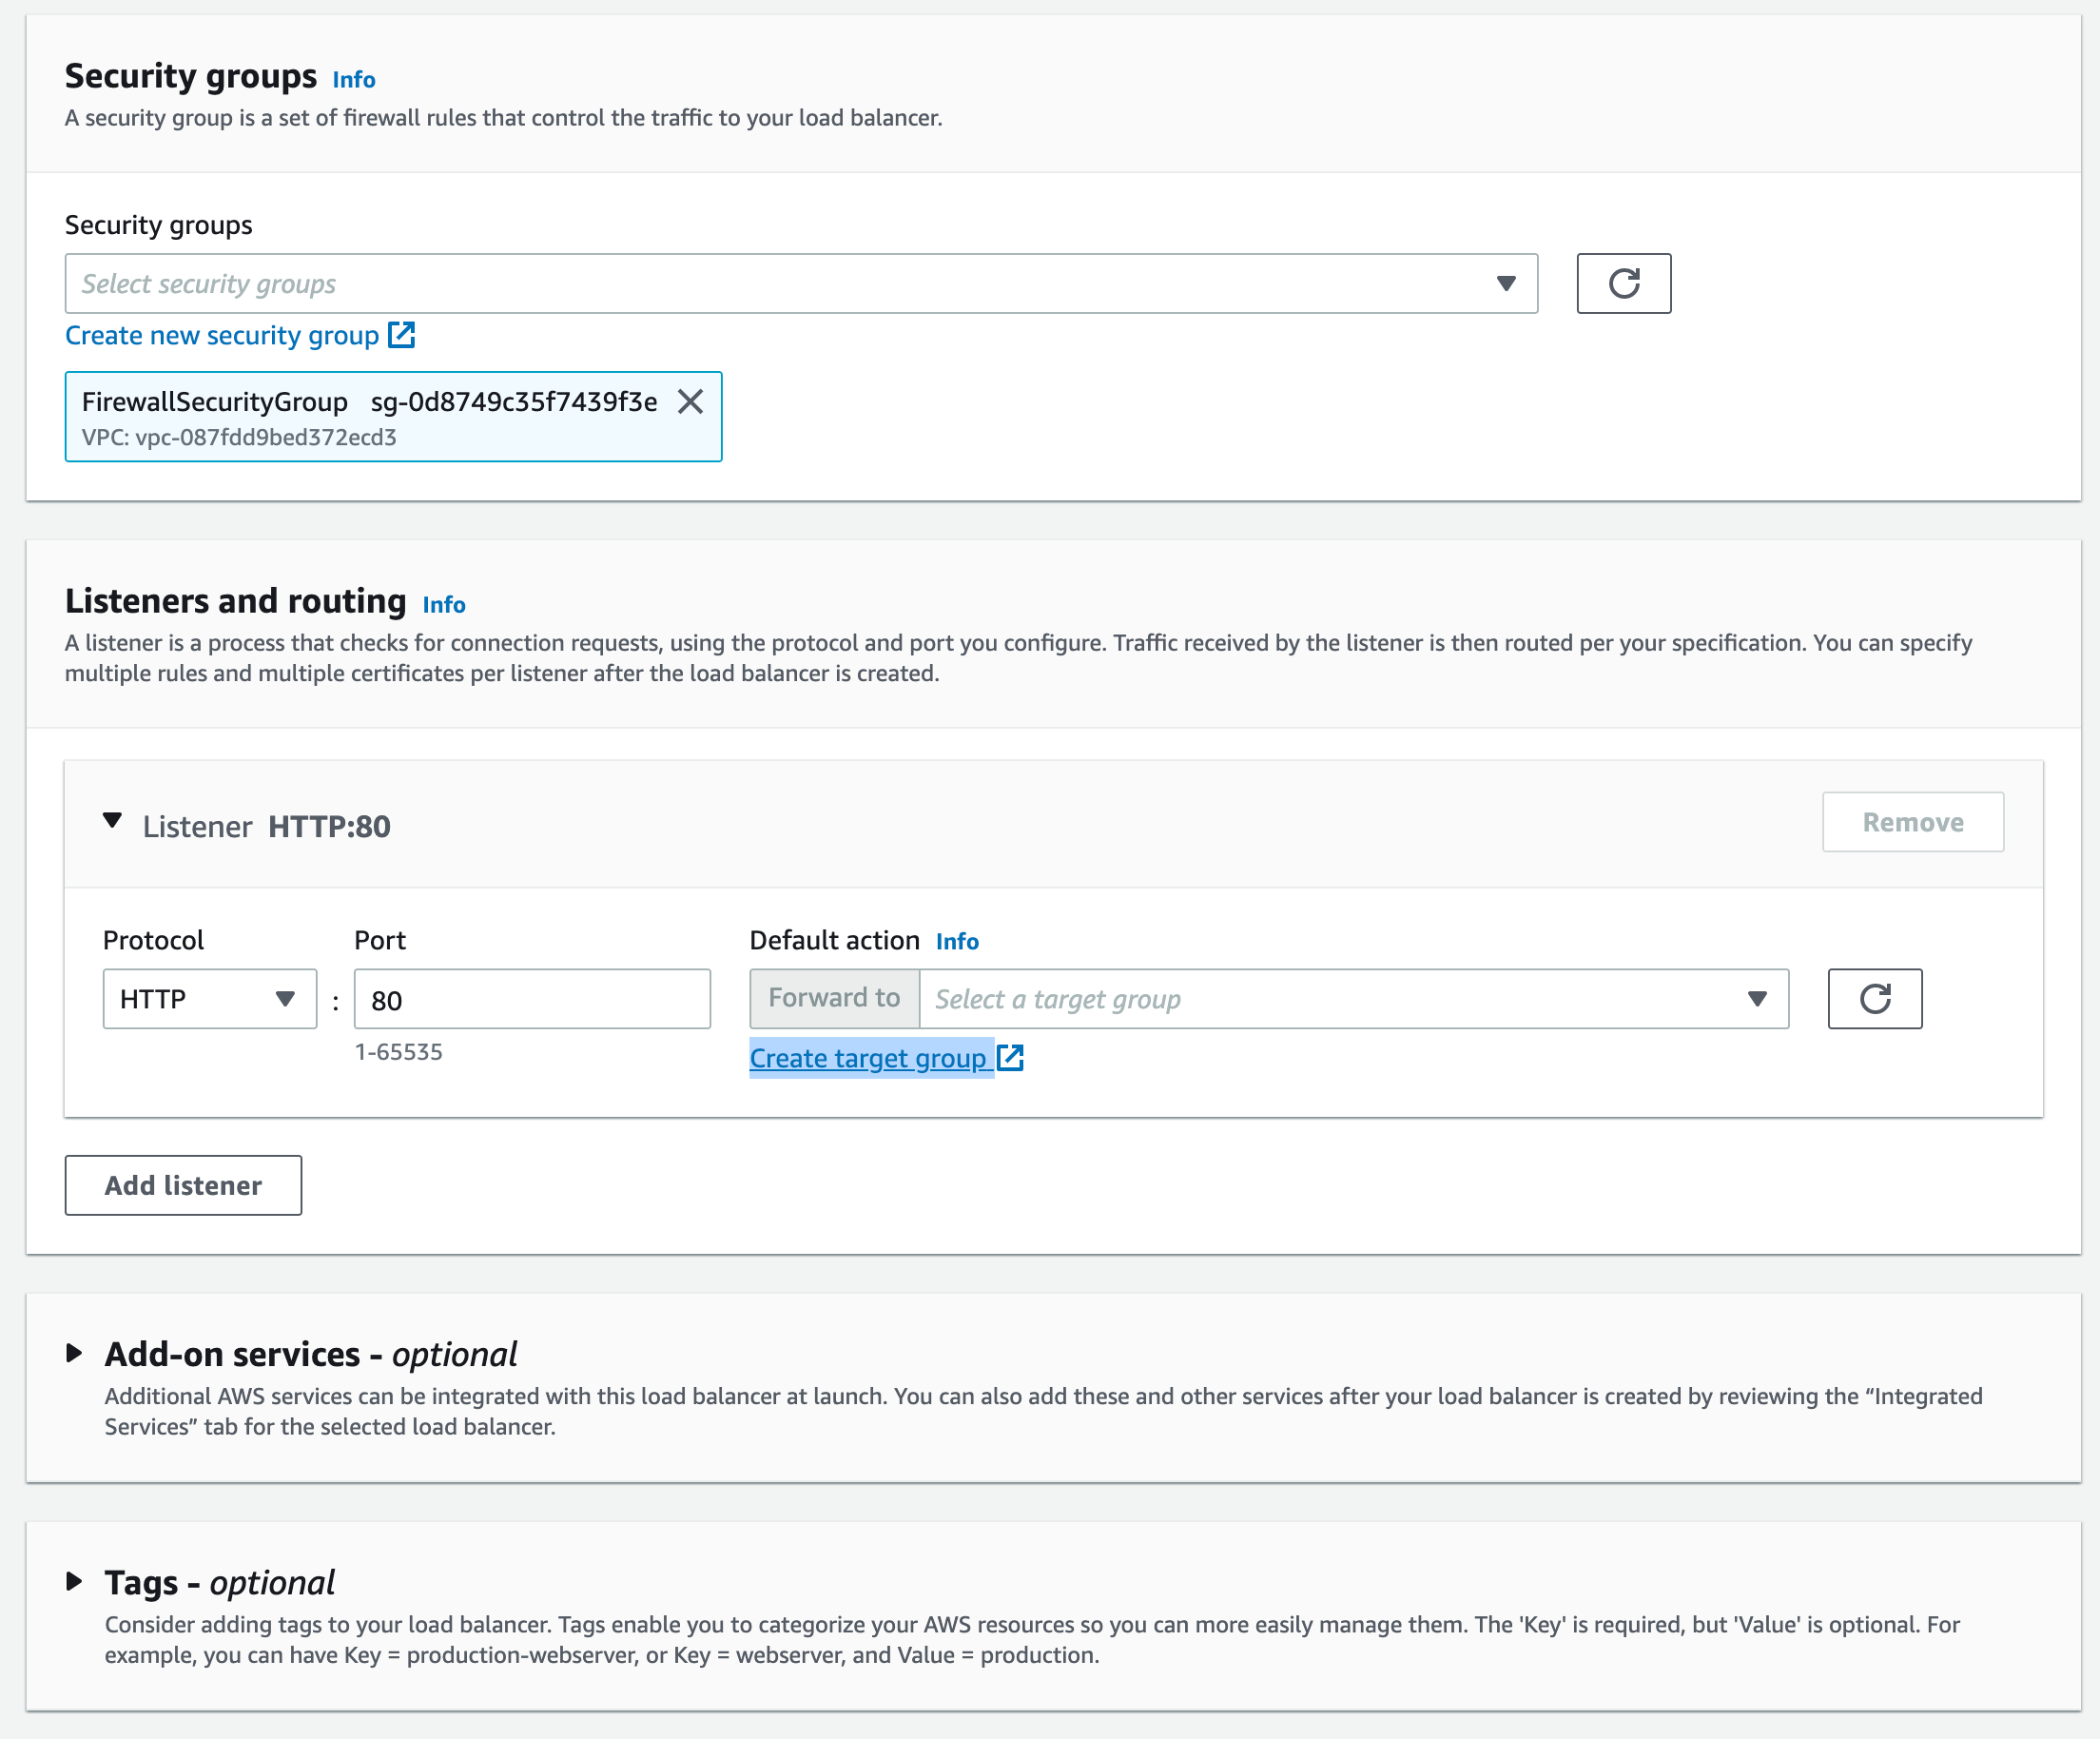
 Add the Security group which allows
 port 80 for HTTP and port 443 for HTTPS inbound and outbound can be open to all
Creating a Target Group to use with ALB
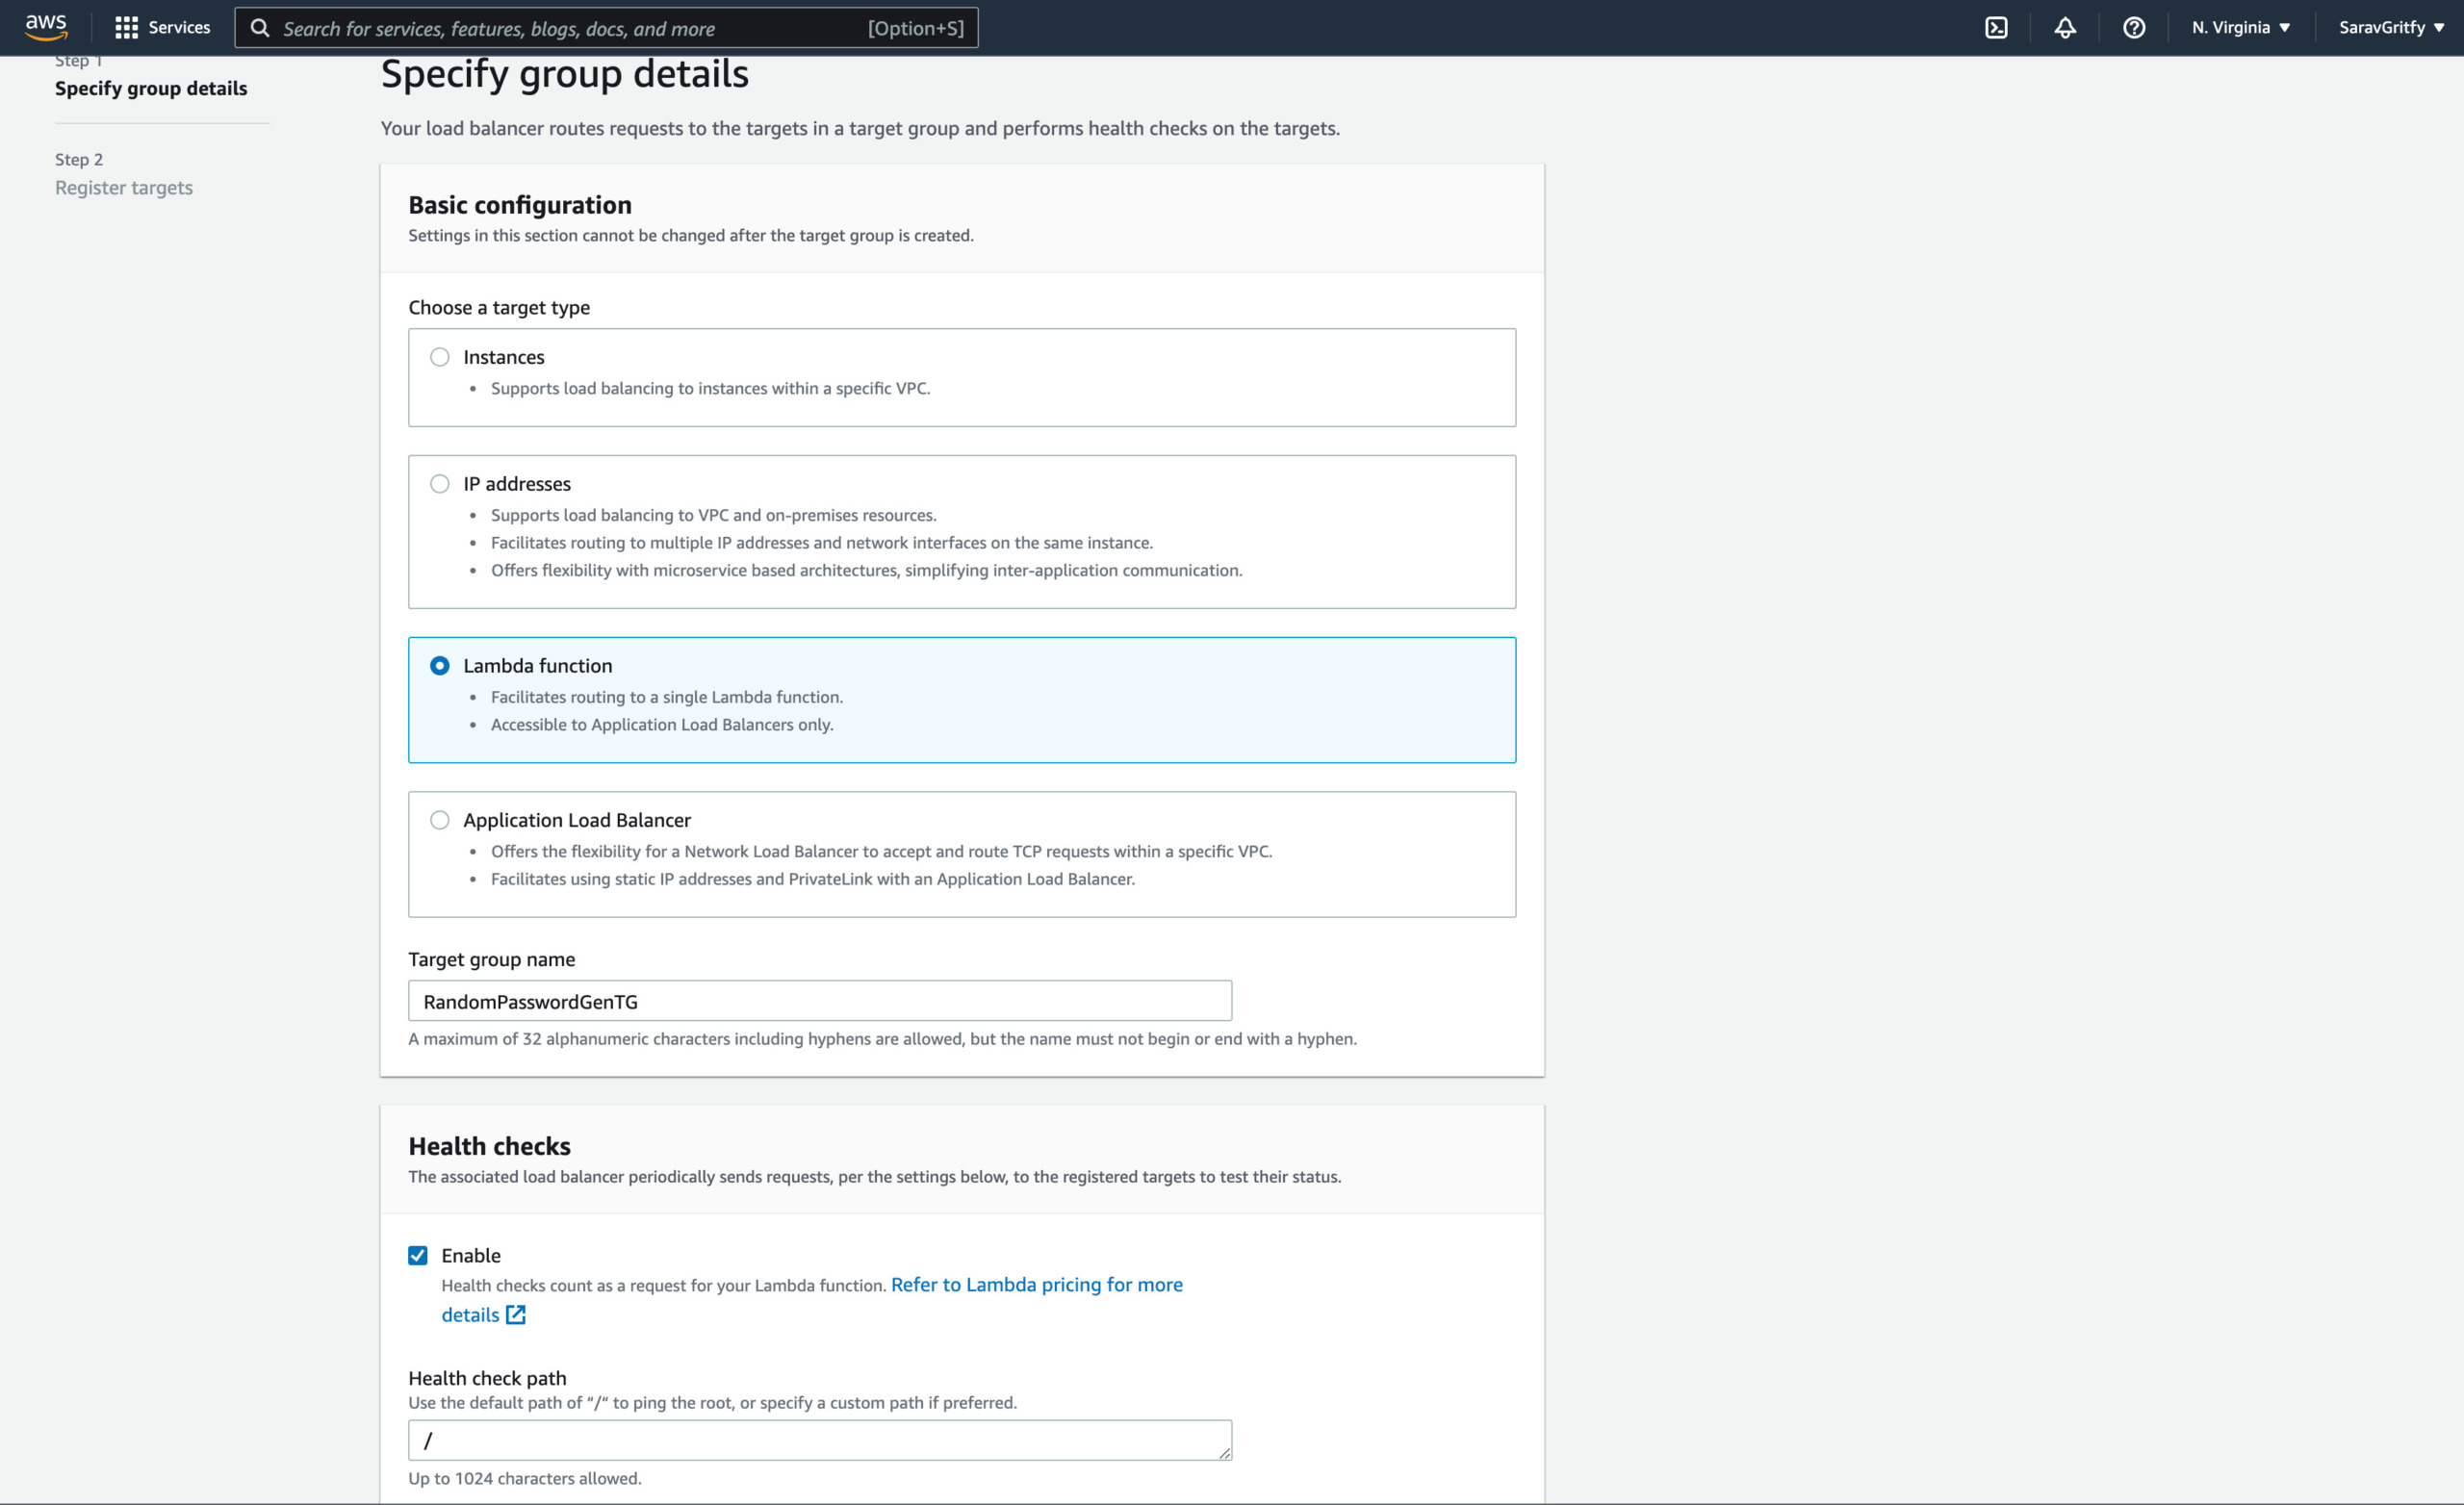
As we are creating ALB, we need to create Target group and Map the Lambda function to it.
Click on the Create target group it would open a new tab
select Lambda function as the target type
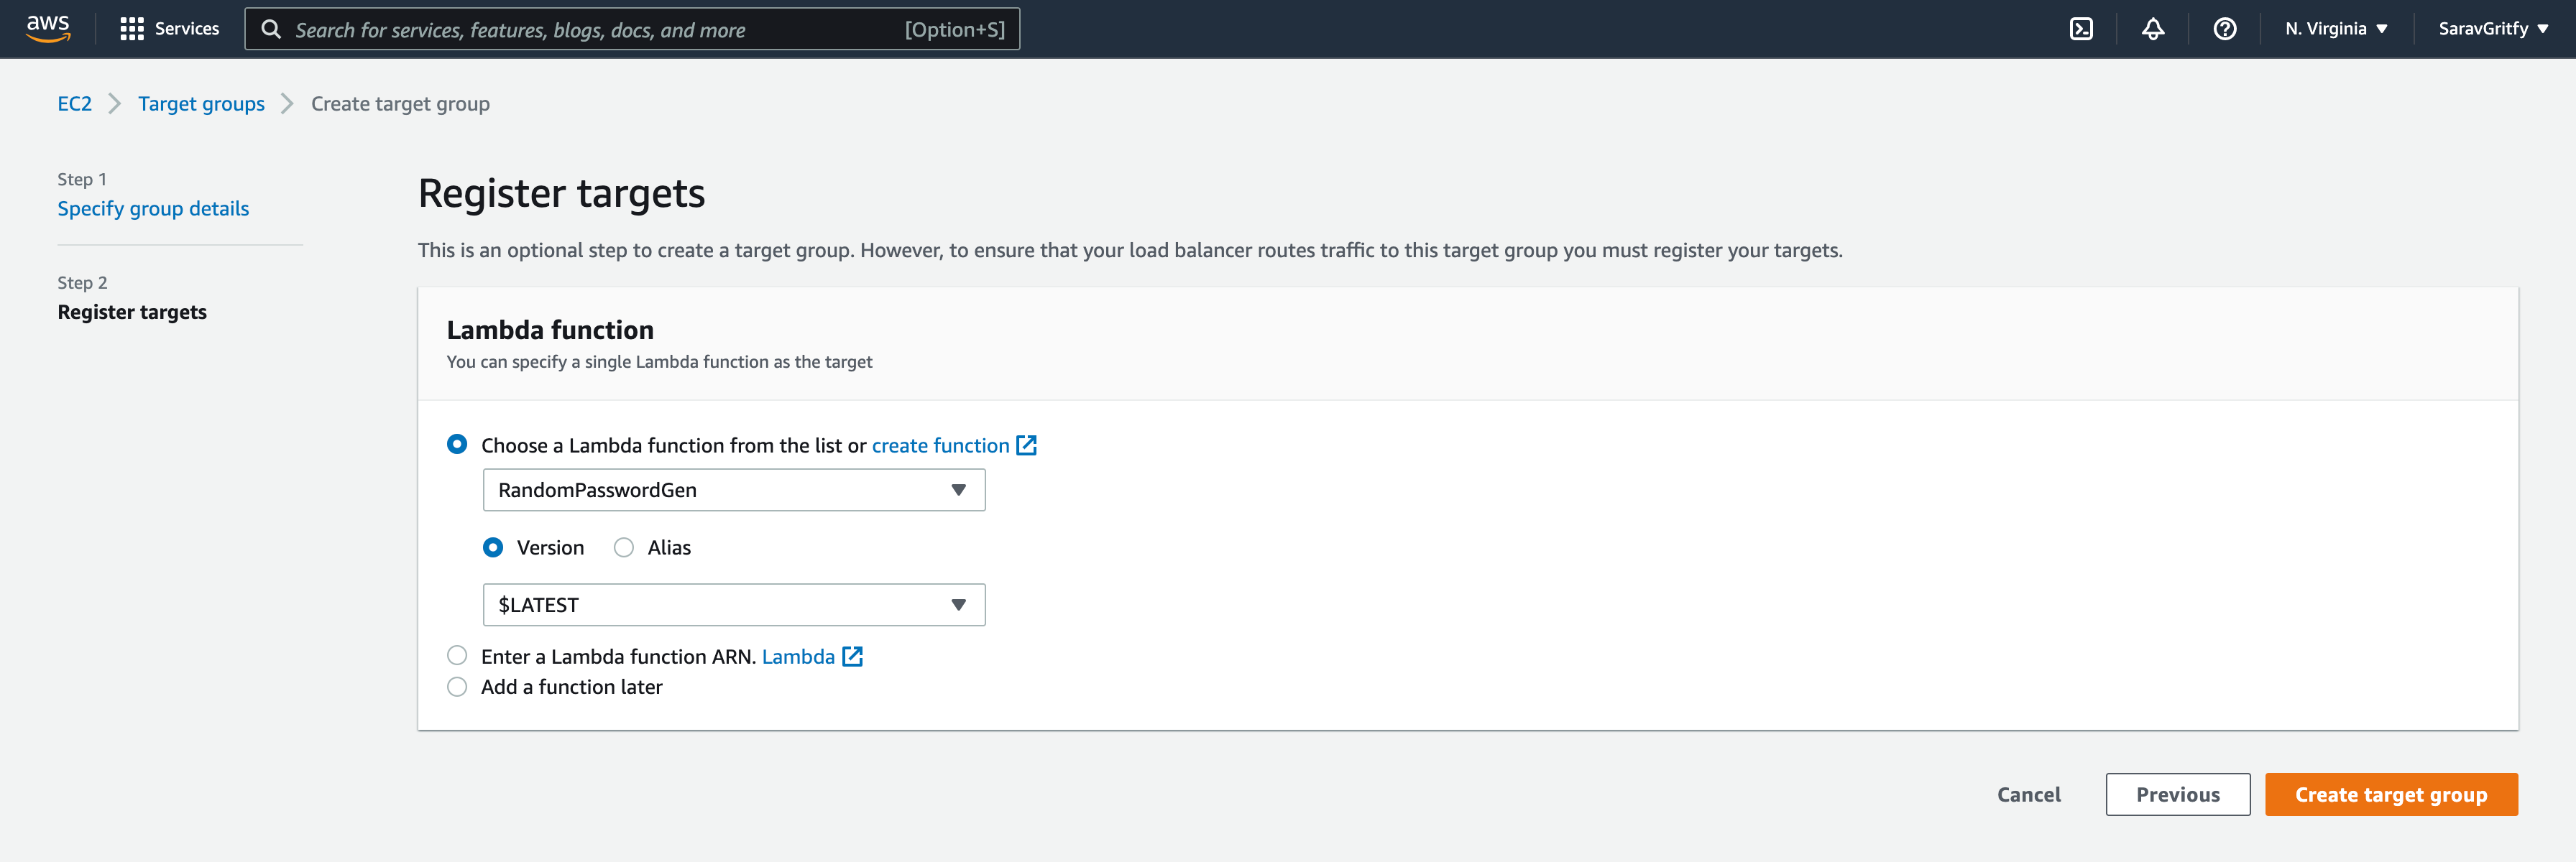
Click Next and Choose the Lambda function from the list and select the Lambda function we have created earlier.
Let the version be $LATEST to make sure the latest version of Lambda is taken by ALB. unless you have any specific version to serve
Click on the Create target group
Configuring Listeners and SSL for our ALB
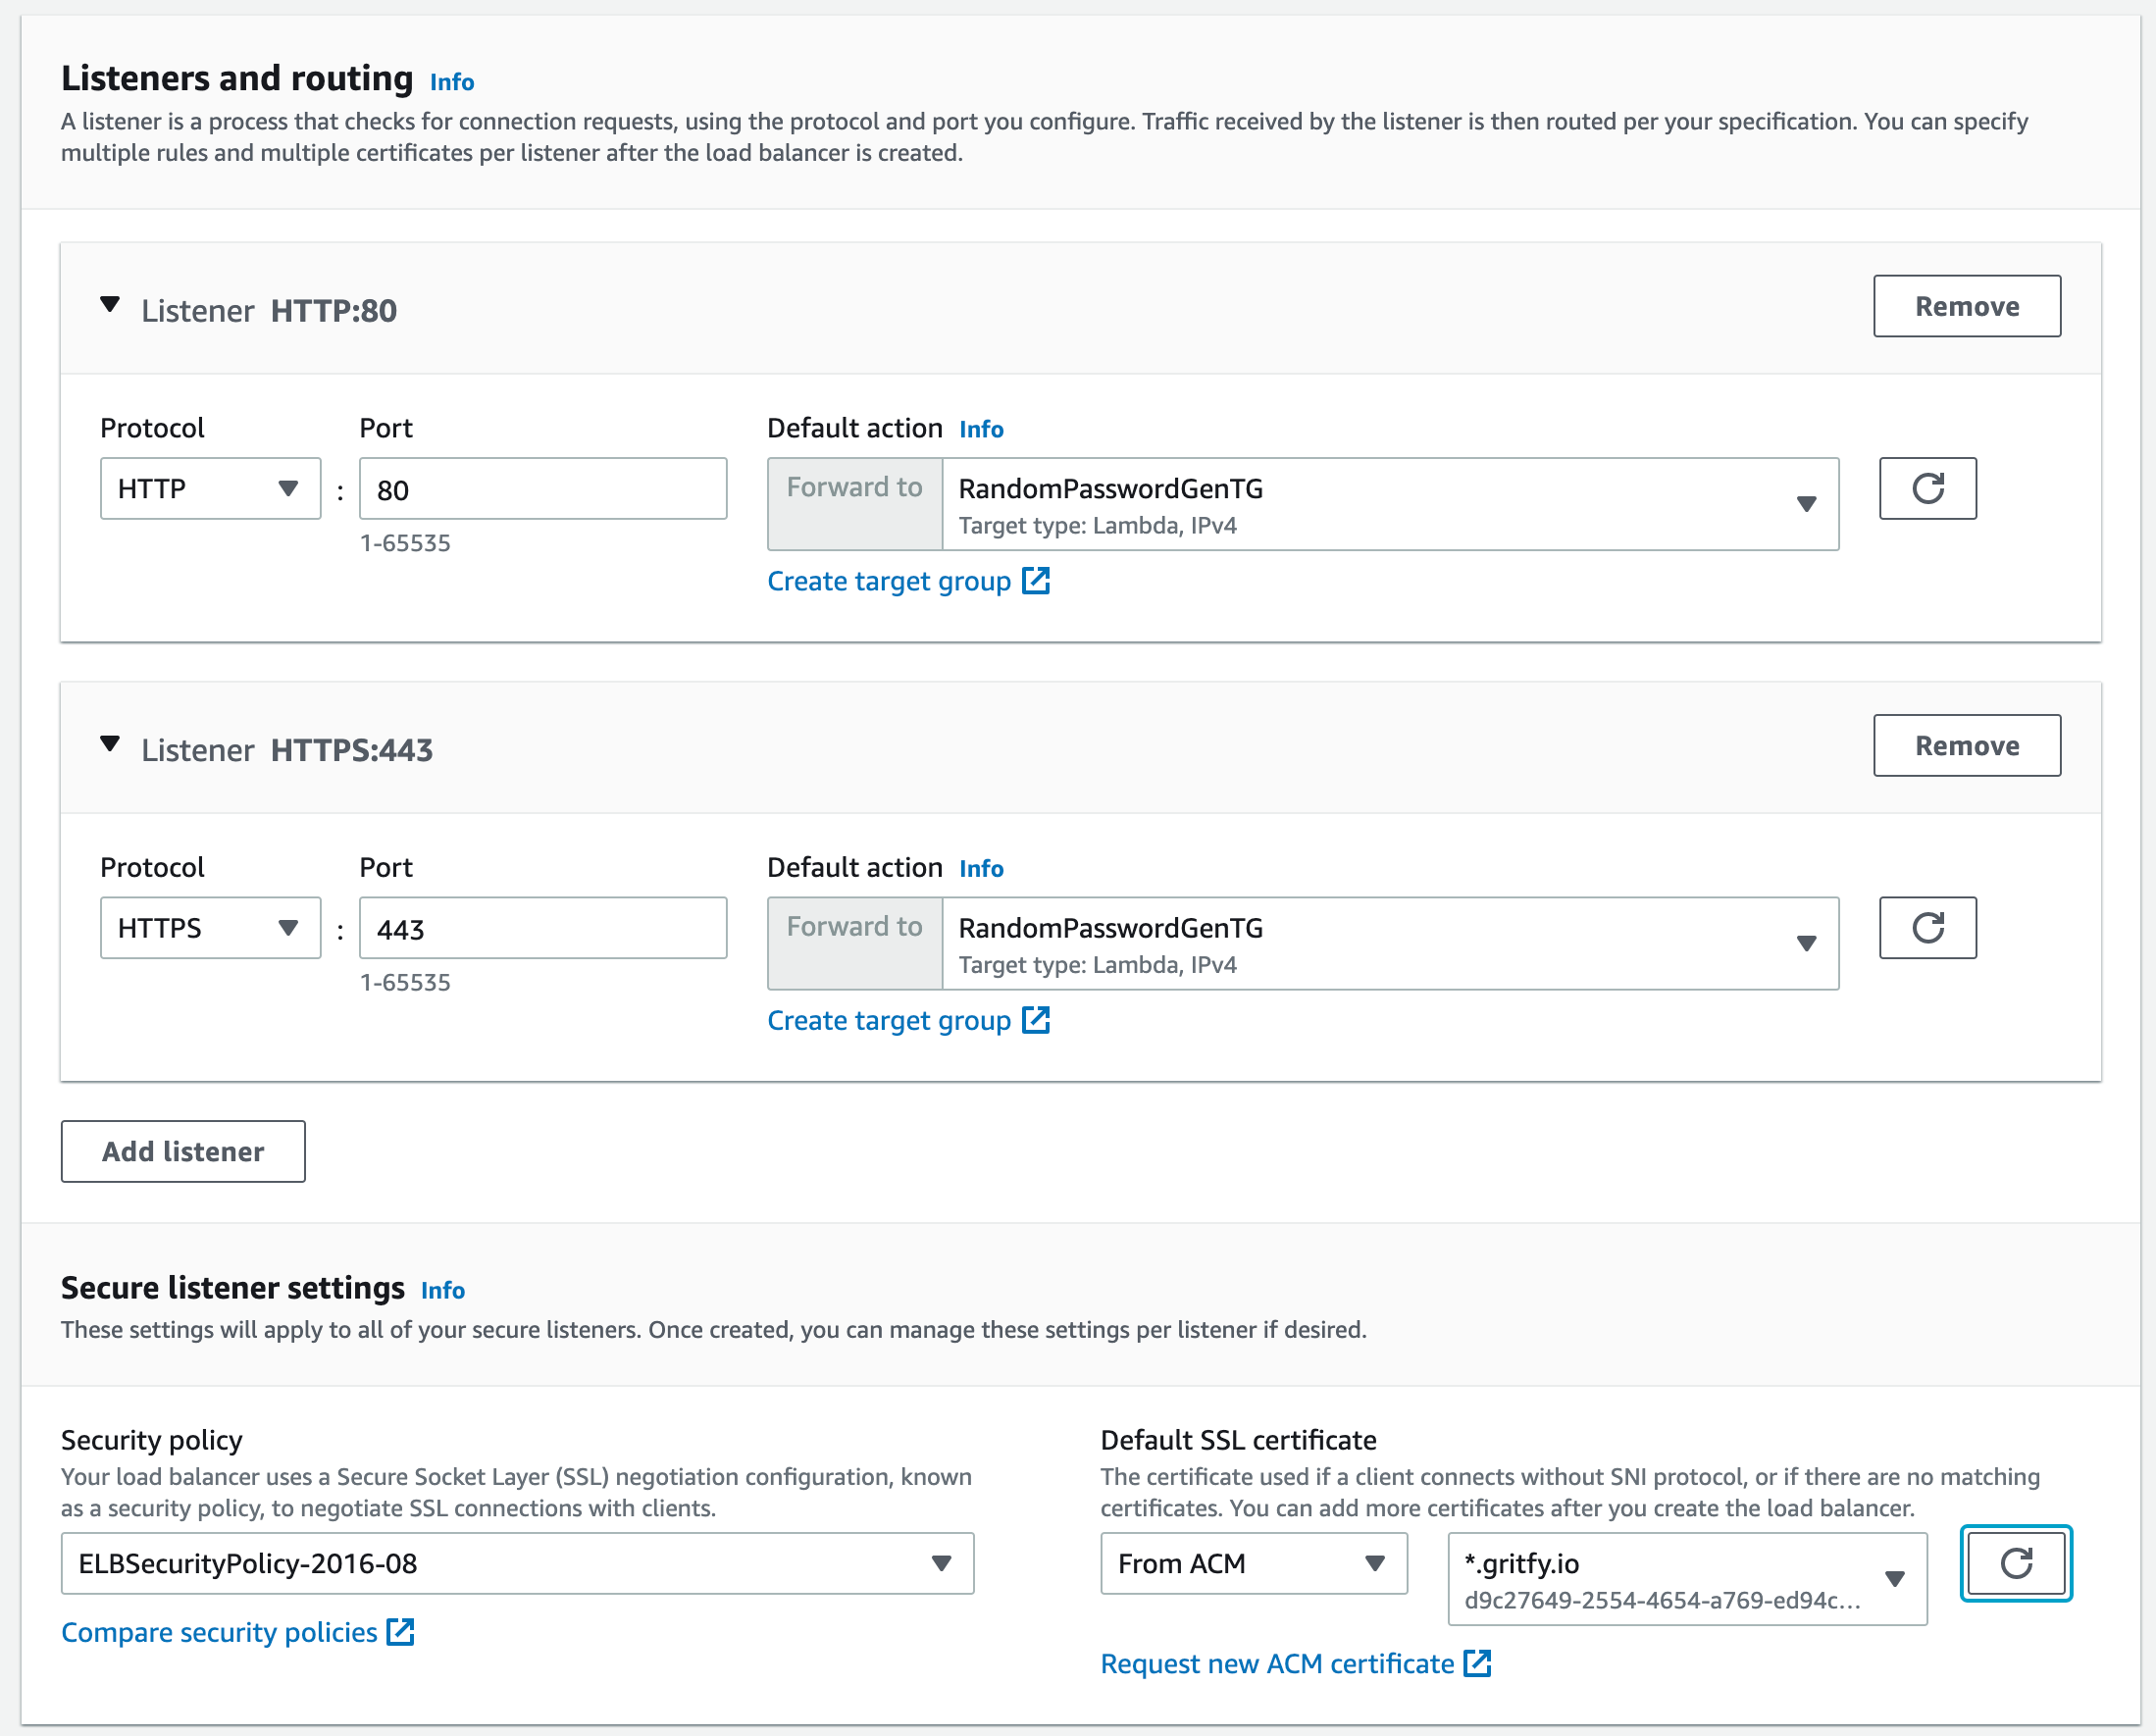
Once the Target group is created come back to the Create load balancer screen(tab) and click on the refresh button near the Default Action forward to
Now your newly created target group should be visible and available for you to select for each listener.
I am going to create two listeners one is HTTP another one is HTTPS.
To create an HTTPS Listener in an ALB, you need to have an SSL certificate of your domain. In my case gritfy.io
If you have a Certificate already from letsencrypt , digicert or any other provider you can choose to upload it to ACM and select the ARN in dropdown.
Otherwise, you can request a certificate from ACM itself as long as you have access to the DNS of that domain to add some CNAME entries.
As we have filled in the details on this ALB creation form, Now we can go ahead and click on Create Load Balancer at the bottom
Access Lambda Function and Test with public URL
Now the application load balancer is an edge component and a trigger for the lambda function
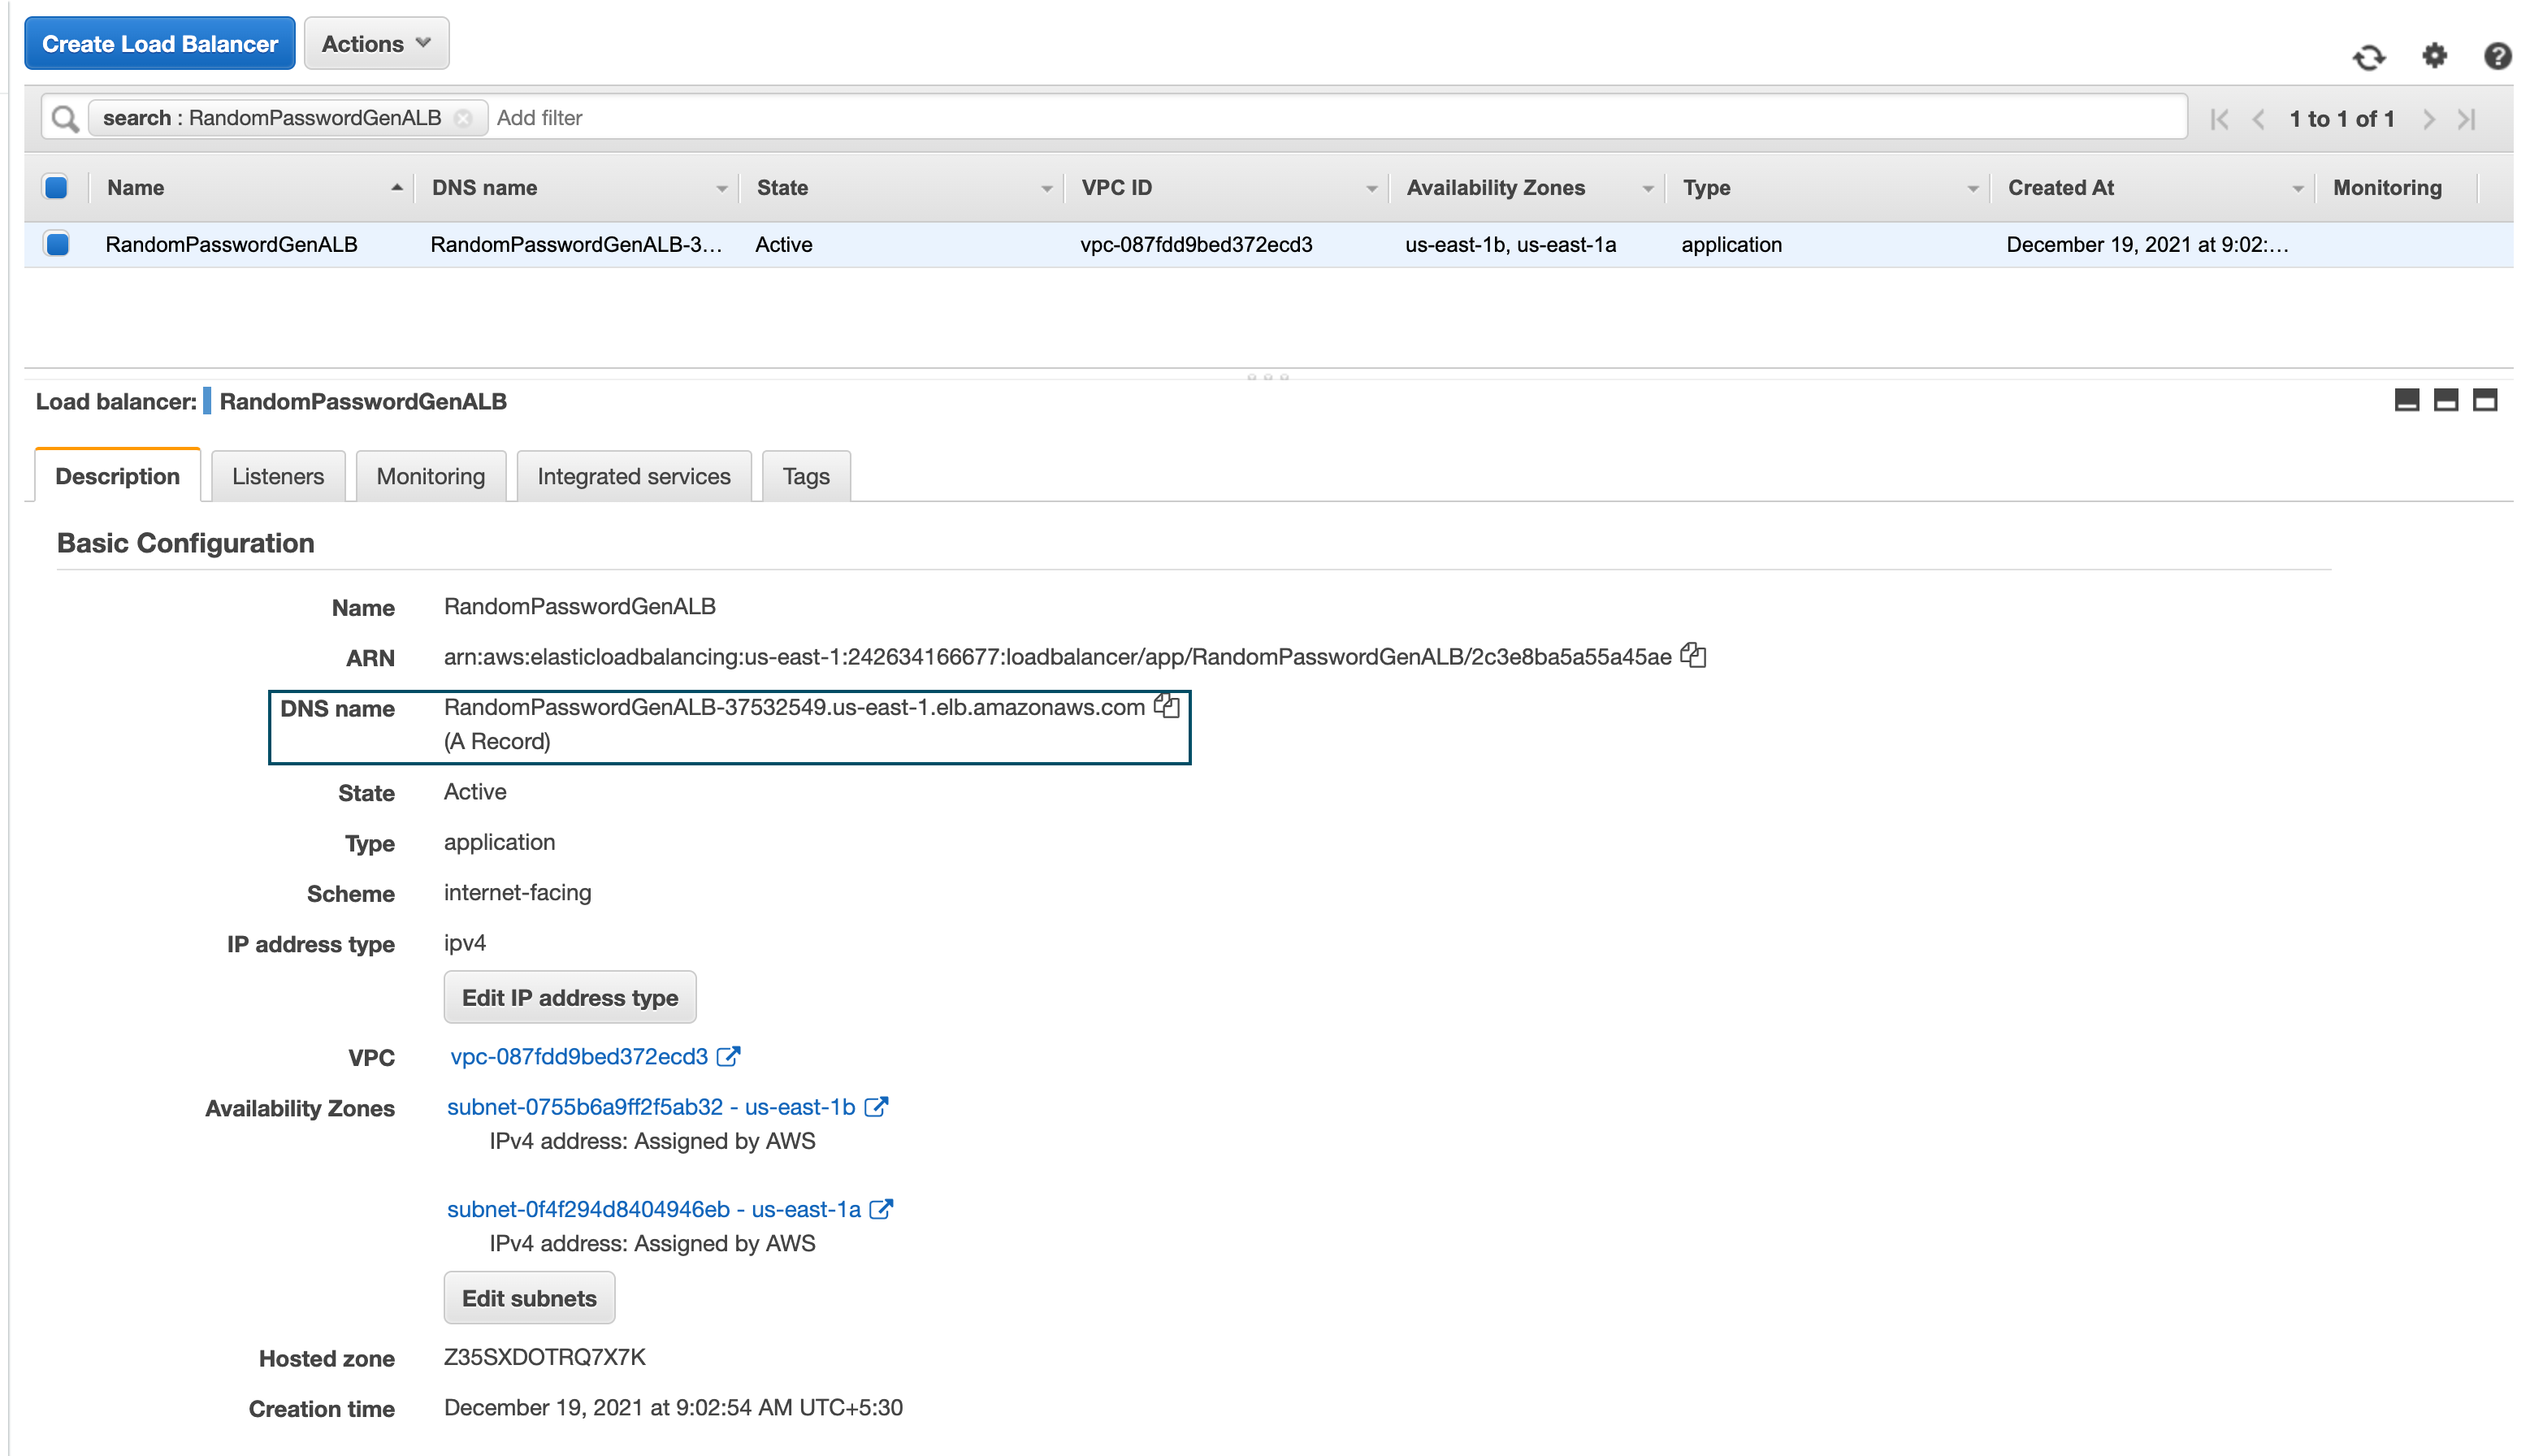
As our application load balancer is public, we would have a Public URL given by ALB which can be used as CNAME for your custom URL like passwordgen.gritfy.io
Or you can simply access it with the ALB public URL itself.
Since I have the domain and the DNS in Route53 I am going to test this Lambda Function ALB Setup with both URLs.
you can see both ALB URL and the custom URL works perfectly fine.
One thing to highlight here is that ALB URL would throw SSL Warning as the certificate we have used in Listener has gritfy.io as the Common Name.
We are avoiding that error with -k on CURL.
Since it is public it mostly is published on custom domains like passwordgen.gritfy.io
Yayyyy.. We have done it.
Conclusion
We have done it yes we have deployed our Random Password Generator Python code into Lamda and made it available to the public using ALB.
Hope this article helps you understand the following points
- How to create Application Load Balancer and Target group for Lambda
- How to create Lambda function and deploy your code
- Testing Lambda function with Test feature and ALB
If you have any questions, please feel free to ask in the comments section.
Cheers
Sarav

Follow me on Linkedin My Profile Follow DevopsJunction onFacebook orTwitter For more practical videos and tutorials. Subscribe to our channel
Signup for Exclusive "Subscriber-only" Content

