Serverless Computing is a disruptive change in the way we used to approach the infrastructure and host our applications.
With Serverless Computing like AWS Lambda, you can simply deploy your single python file without having to worry about writing the production-grade wrappers like gunicorn and supervisor etc.
Serverless computing is the easiest way to test and deploy your application without having to worry about Infrastructure dependencies and prerequisites.
But even easy things come with the cost, yes. I am talking about Administrating and deploying these Lambda Functions and Serverless Applications.
So How do we deploy and roll out versions in Lambda Functions aka Serverless applications?
The most prominent tool we have all been using in the last decade for Continuous Integration and Continuous Deployment is still there to save us.
yes. I am talking about Jenkins
I know there are other tools in the market such as
- Harness
- Argo CD
- CircleCI
- GitLab
But Jenkins are still many people's favourite and I could be somewhere on the top order of that fans list I presume.
The objective of this article is simple. How we are going to deploy AWS Lambda Functions with Jenkins.
So Let's get into the game with no further ado.
Before we see the step by step instructions, Let us talk about prerequisites we might need.
Planning is a foundation for perfect implementation. Don't you agree?
Prerequisites
- Sufficient or Admin Access in Jenkins to Add Plugins and create jobs
- AWS IAM Account with Admin privileges. ( Or necessary privileges)
- Some Basic Skills on Python ( just to understand our HelloWorld app)
- Jenkins must have Git integration with proper Authentication
So We will be deploying a basic Hello World Application built on Python 3.9 for this article.
Since it is python do not confuse Python Lambda function with AWS Lambda Functions
Python Lambda- is an anonymous functionAWS Lambda- is a serverless computing service to host any functions like NodeJS, Python etc.
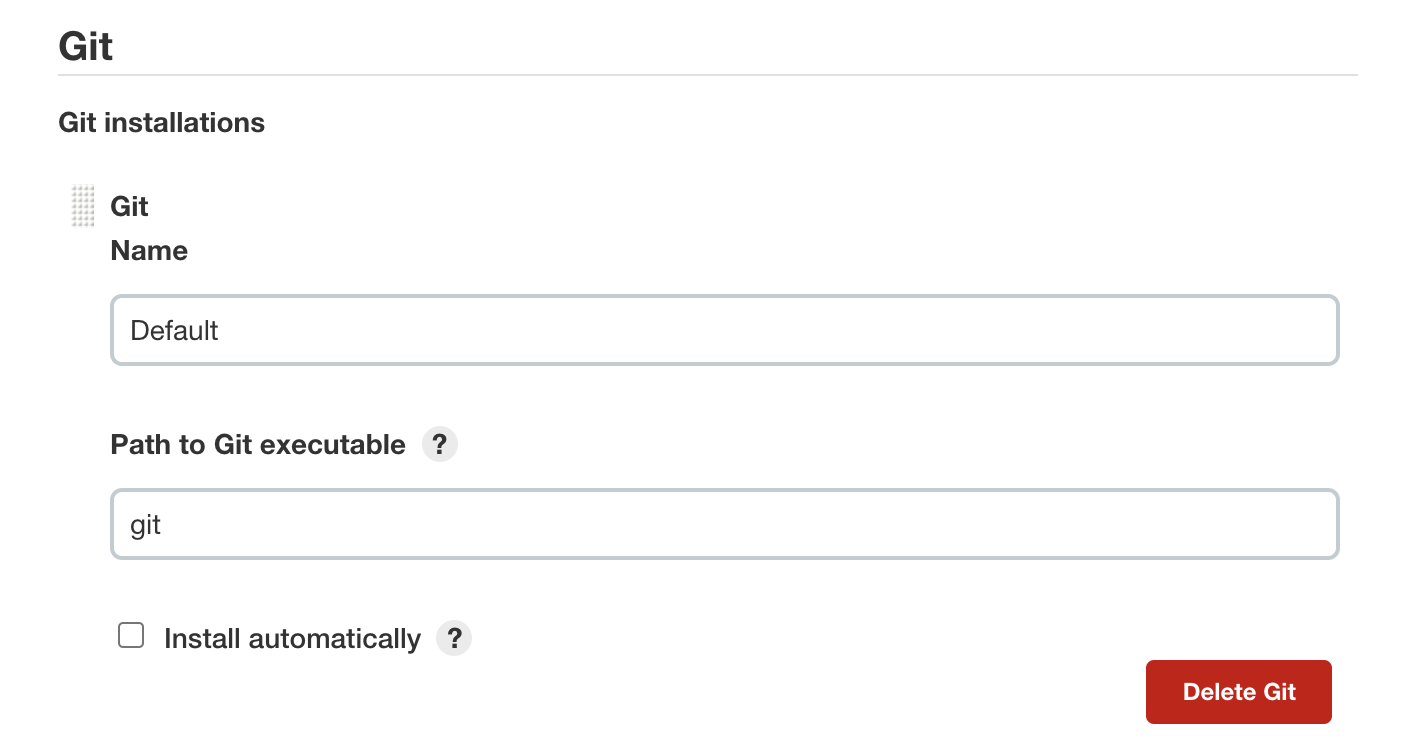
Step 1: Ensuring Git installation
In Jenkins UI, go to Manage Jenkins -> Global Tool Configuration Section of Jenkins.
Note: If you don't see a Manage Jenkins Option, You need to consult with your Administrator. It might be due to insufficient privileges.
Step 2: Install Jenkins-Lambda plugin
The Plus and also the minus of Jenkins is having to find the right plugin for everything.
So we are going to use a plugin too named AWS Lambda Plugin for our deployment
Get it installed by these steps
Go to Manage Jenkins -> Manage Plugins -> Available -> AWS Lambda Plugin
Step 3: Create and Configure Source Code Management (Git)
Since our Sourcecode, the Python Helloworld code is saved in remote Version Control repository ( GitLab, GitHub, bitbucket etc)
we should have configured git to be able to connect with the right credentials so that it can pull the code.
I presume you have already done the GIT - Jenkins integration and moving on.
Now let us create a new Job as a free style project.
Go to Dashboard -> New Item (Freestyle project)
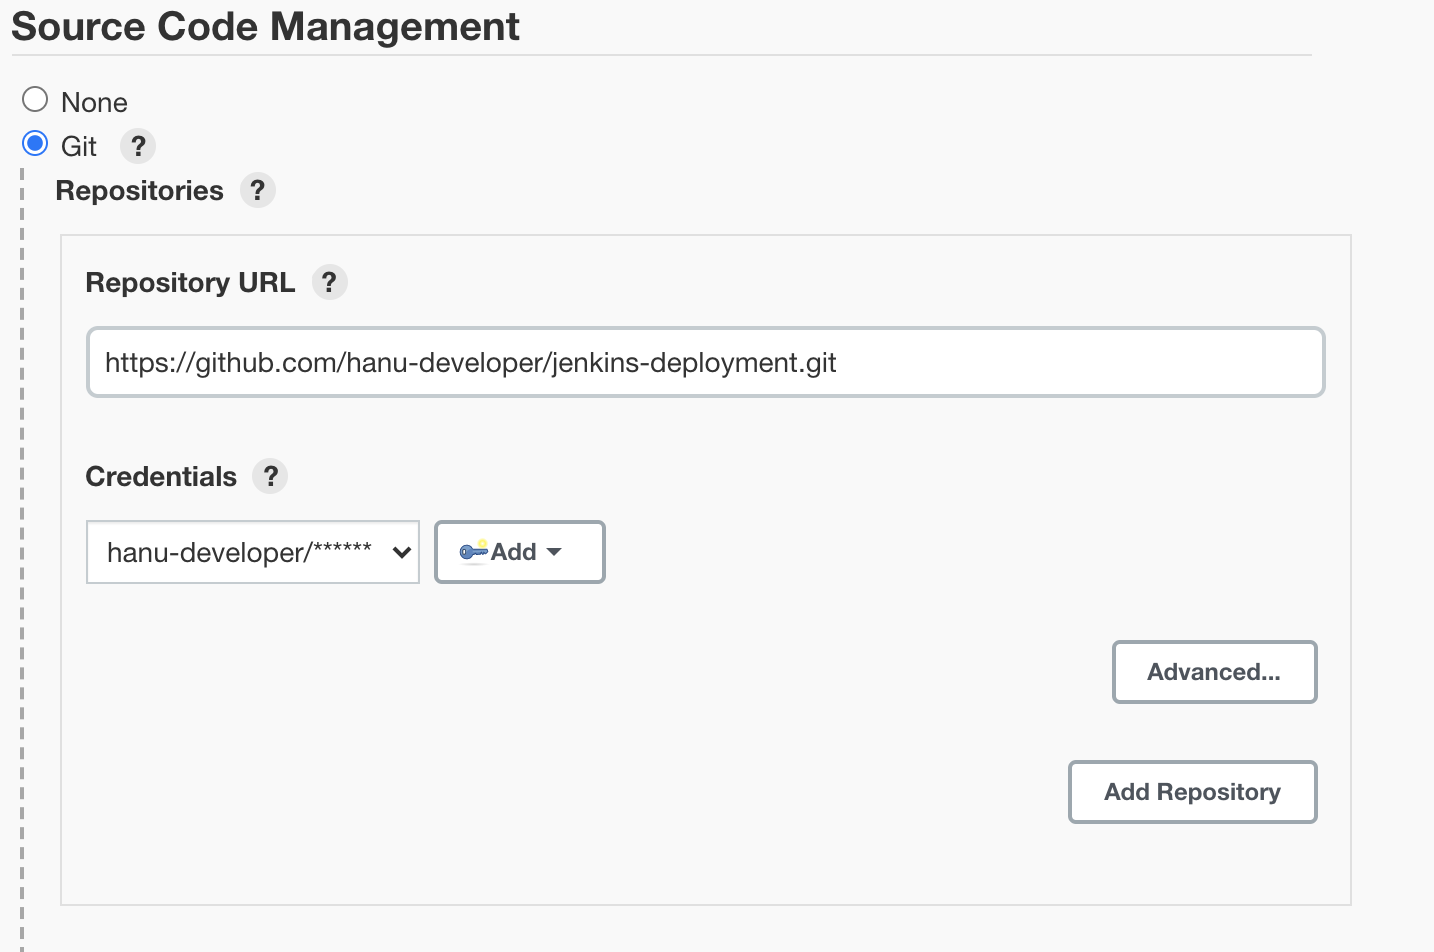
Click on Source Code Management and update the Repository URL field with the project repository URL on the configuration page.
Note: If you don't have it ready, we got you covered. Use this URL for a Sample Lambda function.
If you haven't added any credentials yet, click on Add. Upon adding it, you would be able to select it from the credentials dropdown.
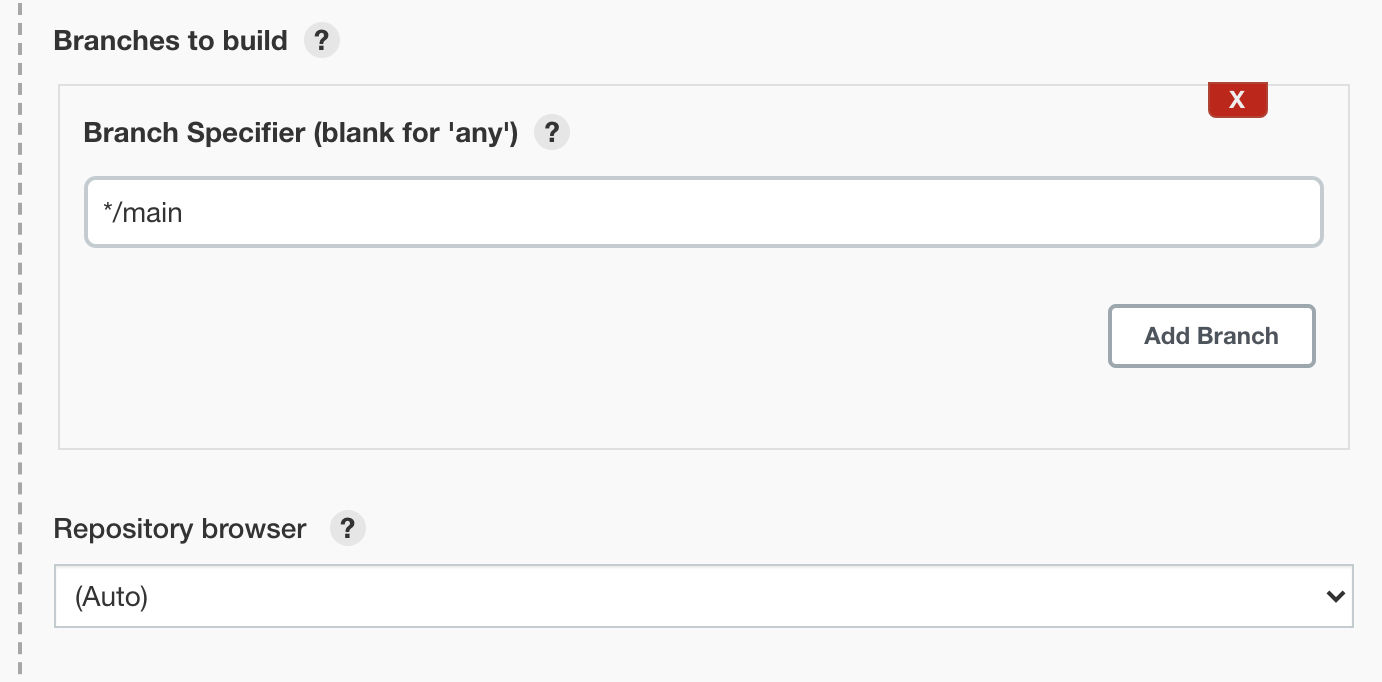
I use the default branch(*/main) to deploy in this example.
Step 4: Configure Lambda Deployment
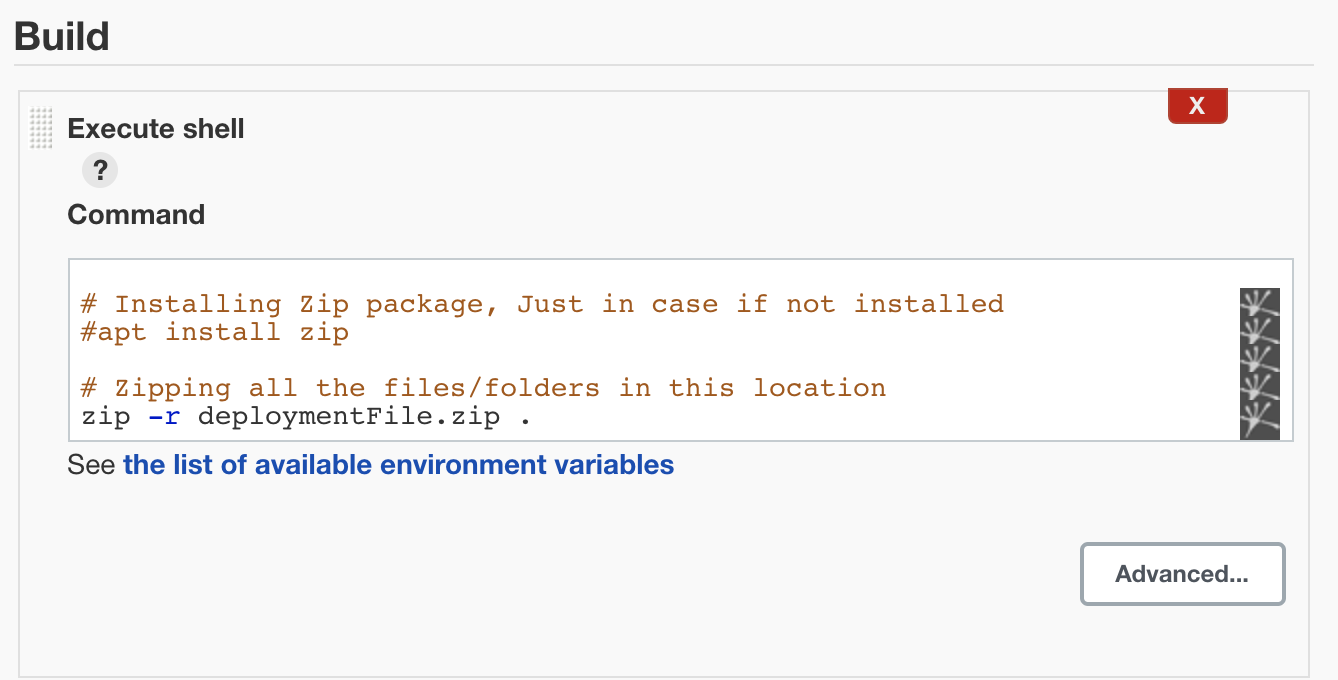
Before we go to the Lambda deployment configuration, Let's execute couple of shell commands for creating a zip file for deployment.
Under Build Environment Add build step -> Execute shell.
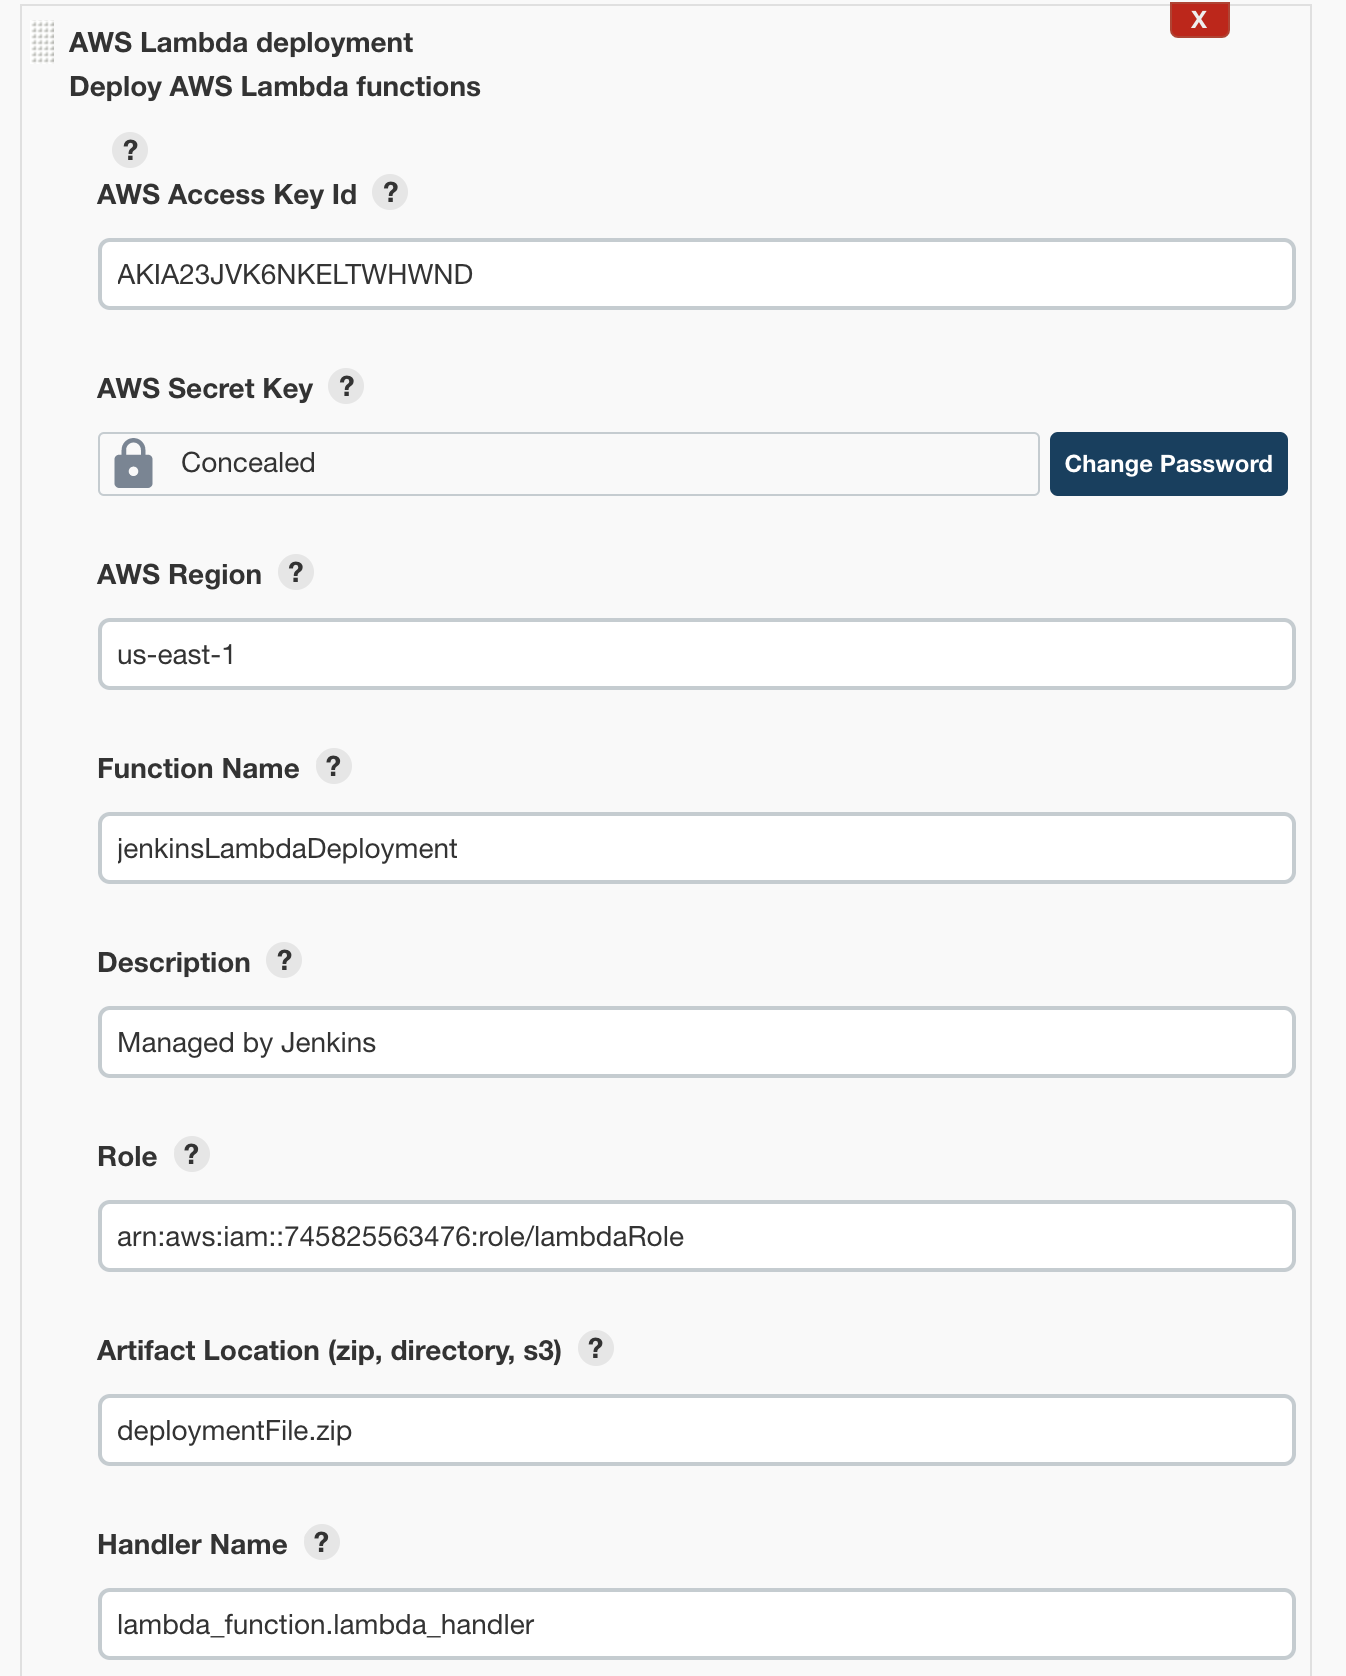
Add build step -> AWS Lambda Deployment.
AWS Access Key Id: User Access Key
AWS Secret Key: User Secret Key
Region: Specify the region where you want to have this lambda. In my case, its us-east-1
Function Name: Name of the function (Note: If the function is not yet created, this job will automatically create and deploy).
Role: Specify ARN of a role that has permission to create, deploy, execute and publish lambda.
Note: If you are trying to deploy lambda with a VPC like me, you need to add network interface related permissions ec2:DescribeNetworkInterfaces, ec2:CreateNetworkInterface, and ec2:DeleteNetworkInterface to the role ( See AWS Forum ).
{
  "Version": "2012-10-17",
  "Statement": [
    {
      "Effect": "Allow",
      "Action": [
        "ec2:DescribeNetworkInterfaces",
        "ec2:CreateNetworkInterface",
        "ec2:DeleteNetworkInterface",
        "ec2:DescribeInstances",
        "ec2:AttachNetworkInterface"
      ],
      "Resource": "*"
    }
  ]
}
Artifact Location: This can be the zip file like I did or any S3 location.
Handler Name: Lambda handler name (I am using default handler).
Note: For nodejs, <filename>.handler. For python, <filename>.lambda_handler
Memory Size: Specify memory size between 128 - 1024 (Only Multiples of 64).
Timeout: Specify the function time out between 1 - 300 seconds.
Runtime: Specify the language in which you are writing the function.
Update Mode: Select Code, If it's just code changes, select Configuration if there are any config changes and If you have changed both, then select Code & Configuration.
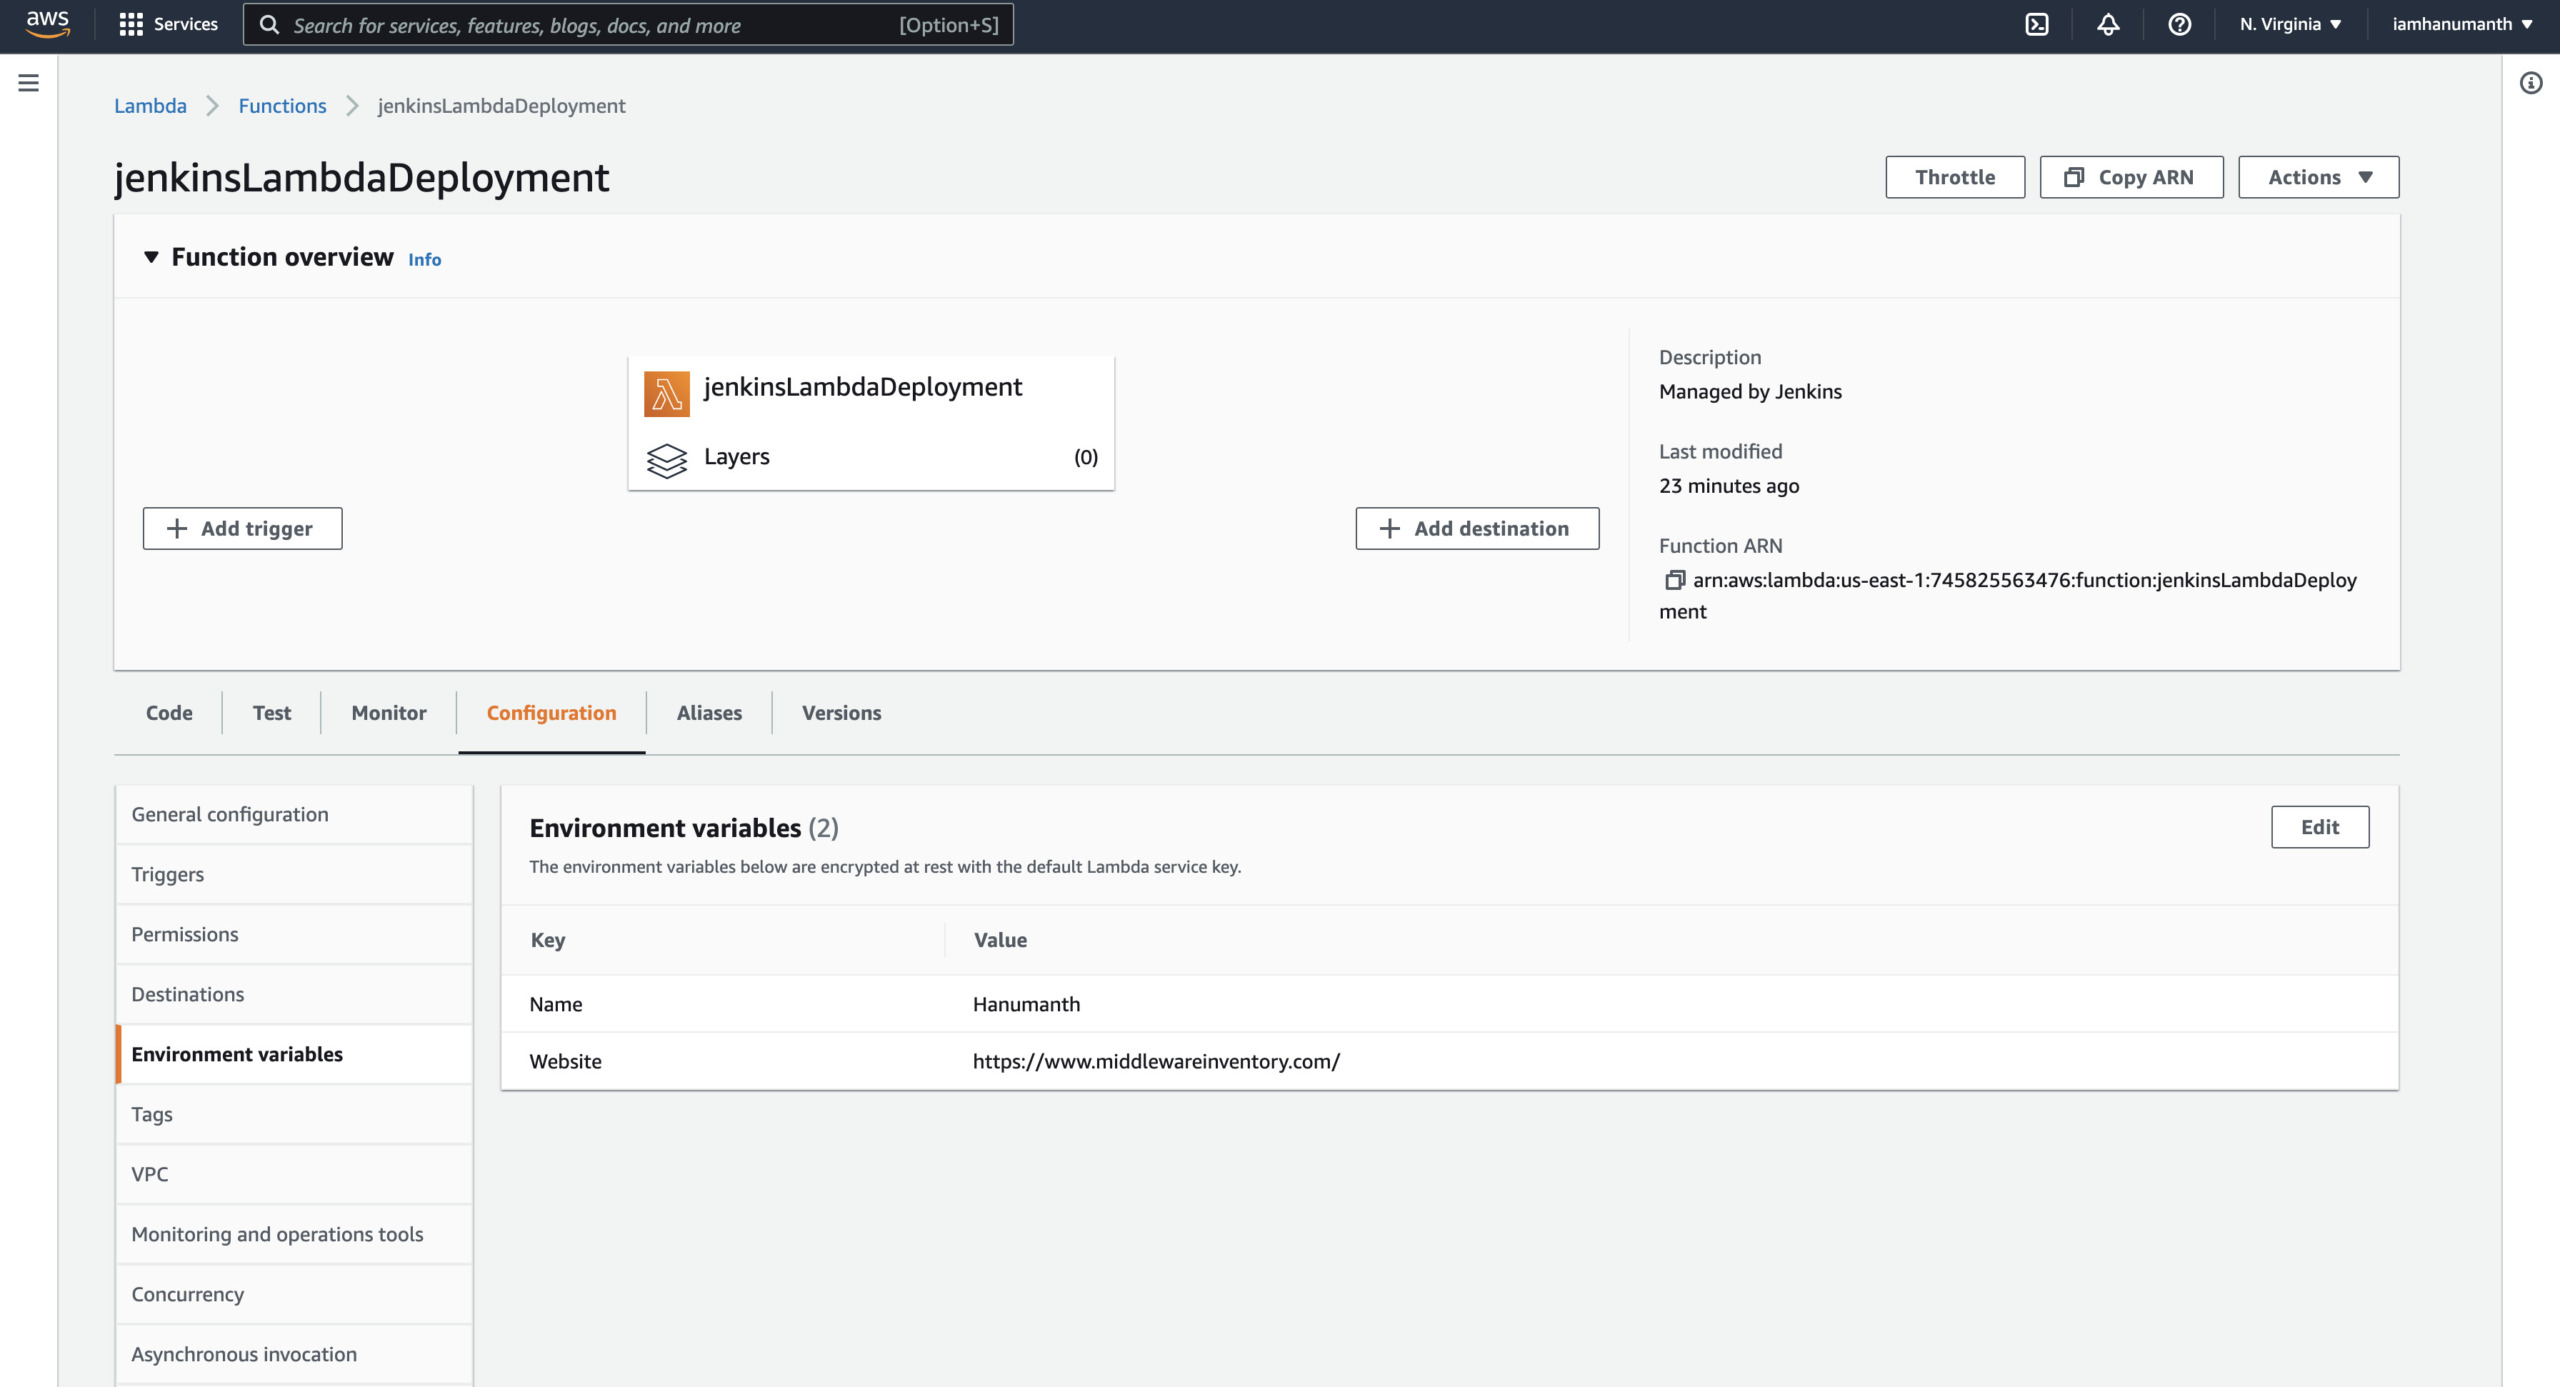
If you have any Environmental Variables, please check the Configure environment and add both Key & Value.
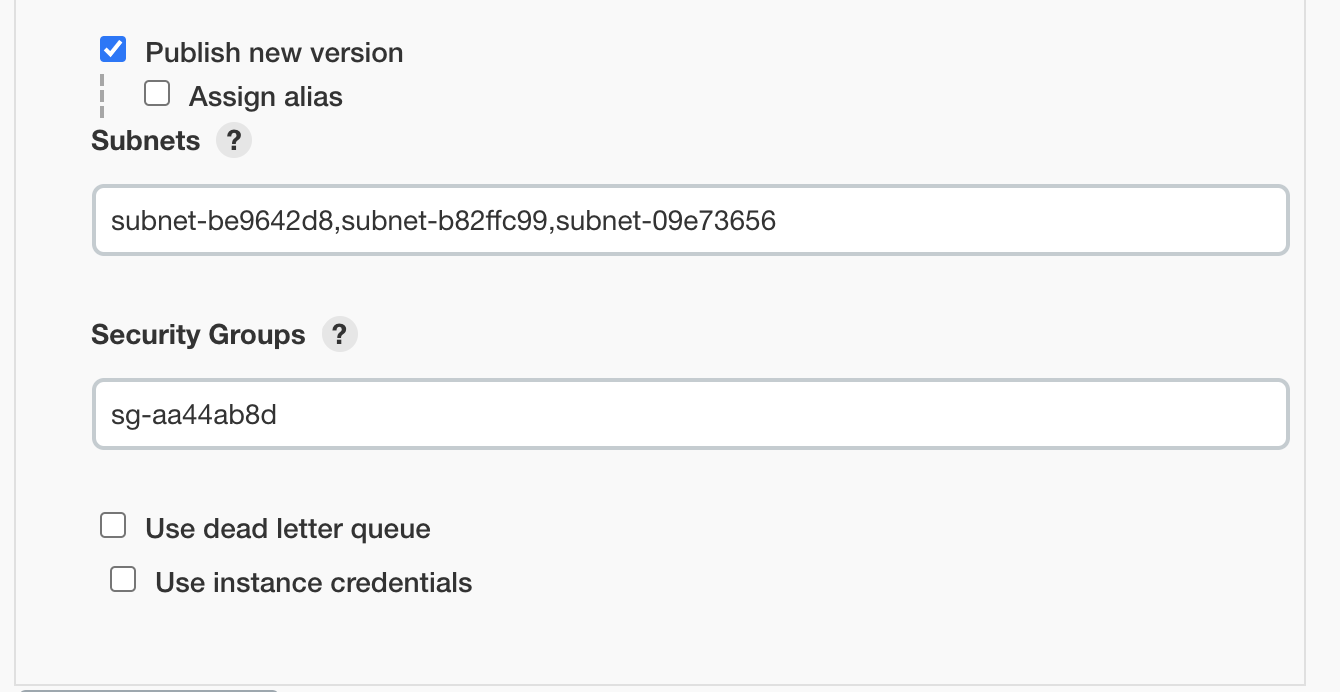
If you want to add VPC Configuration, click on Advanced and the subnet/subnets separated by a comma. Also, add a security group, if any.
We completed configuring the Jenkins job by doing all the above.
Build and Validate
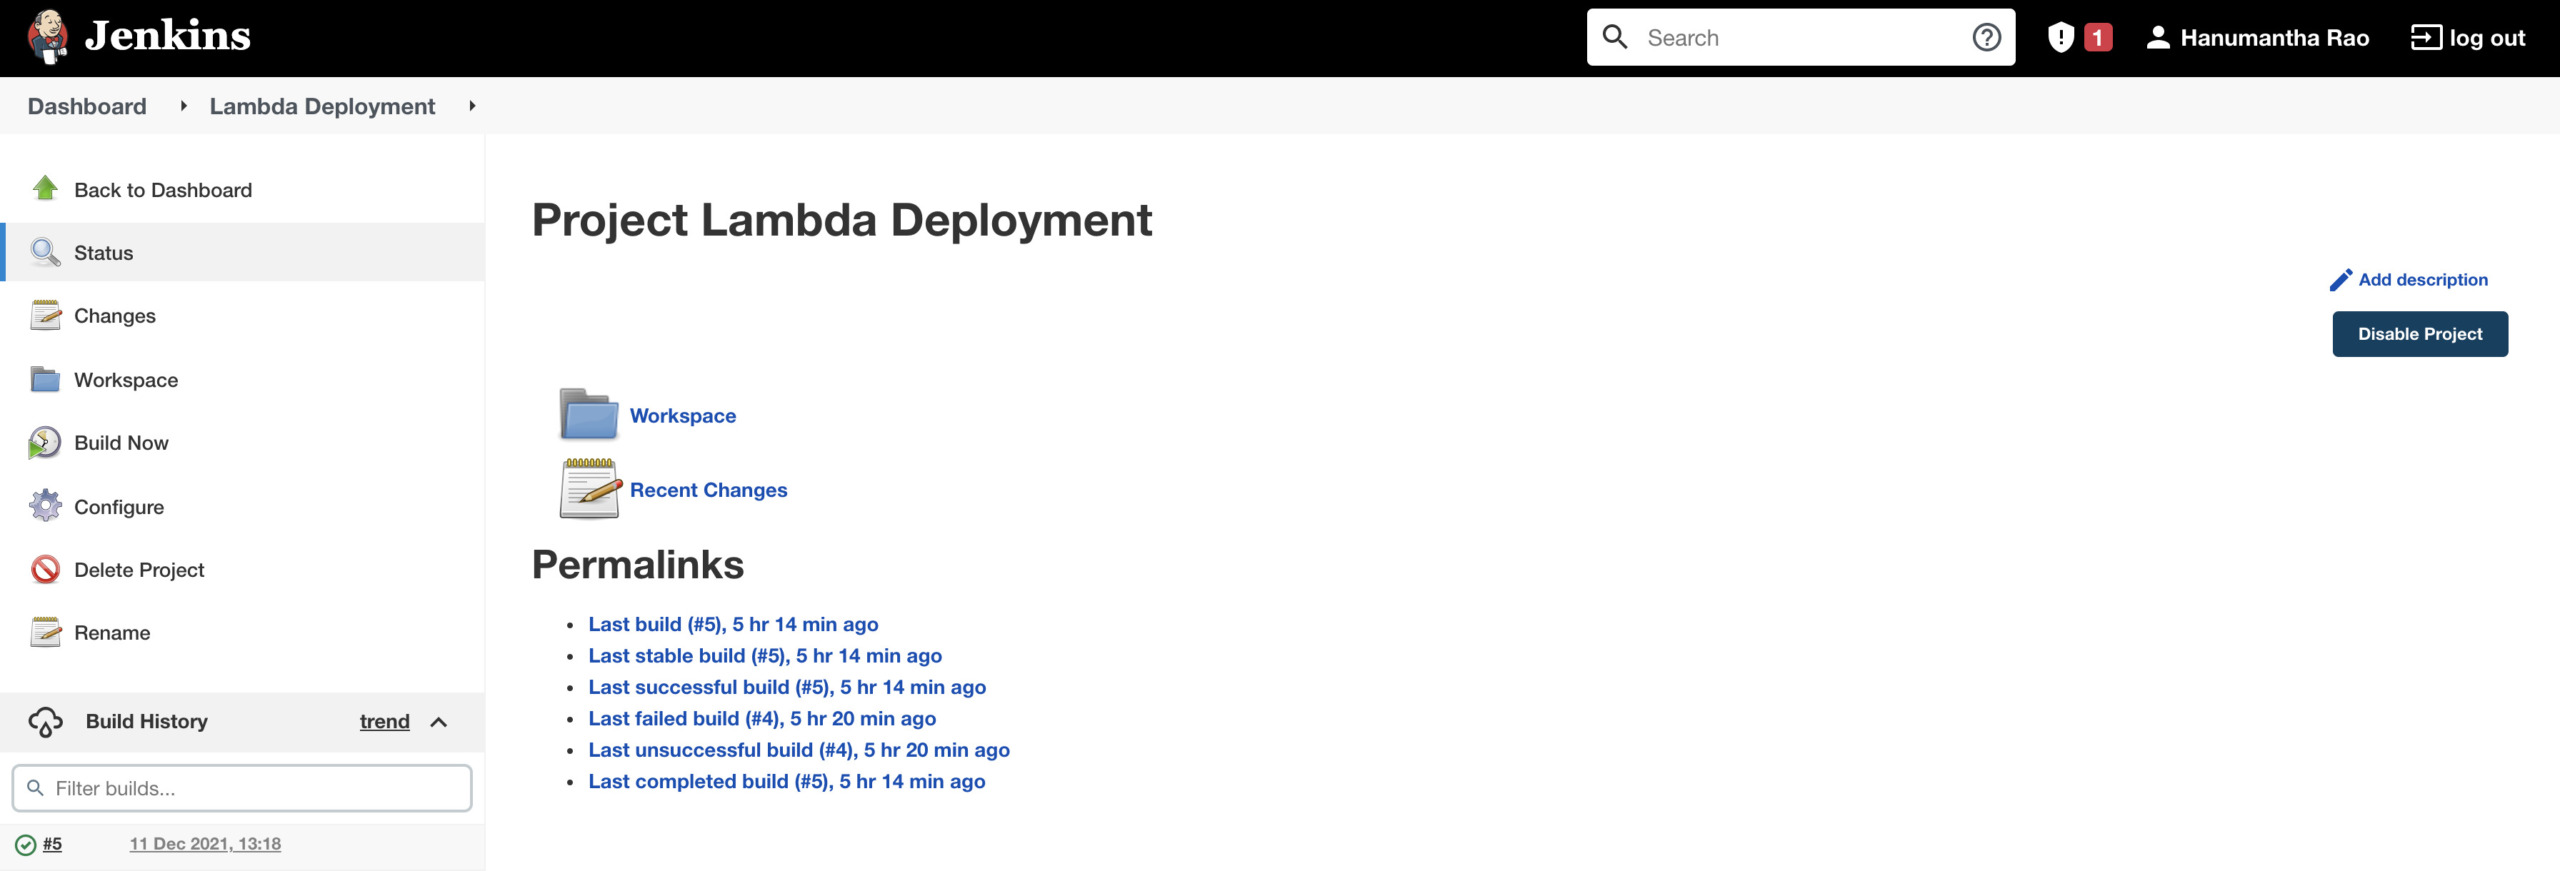
Click on the job you created. On the job's page, click Build Now.
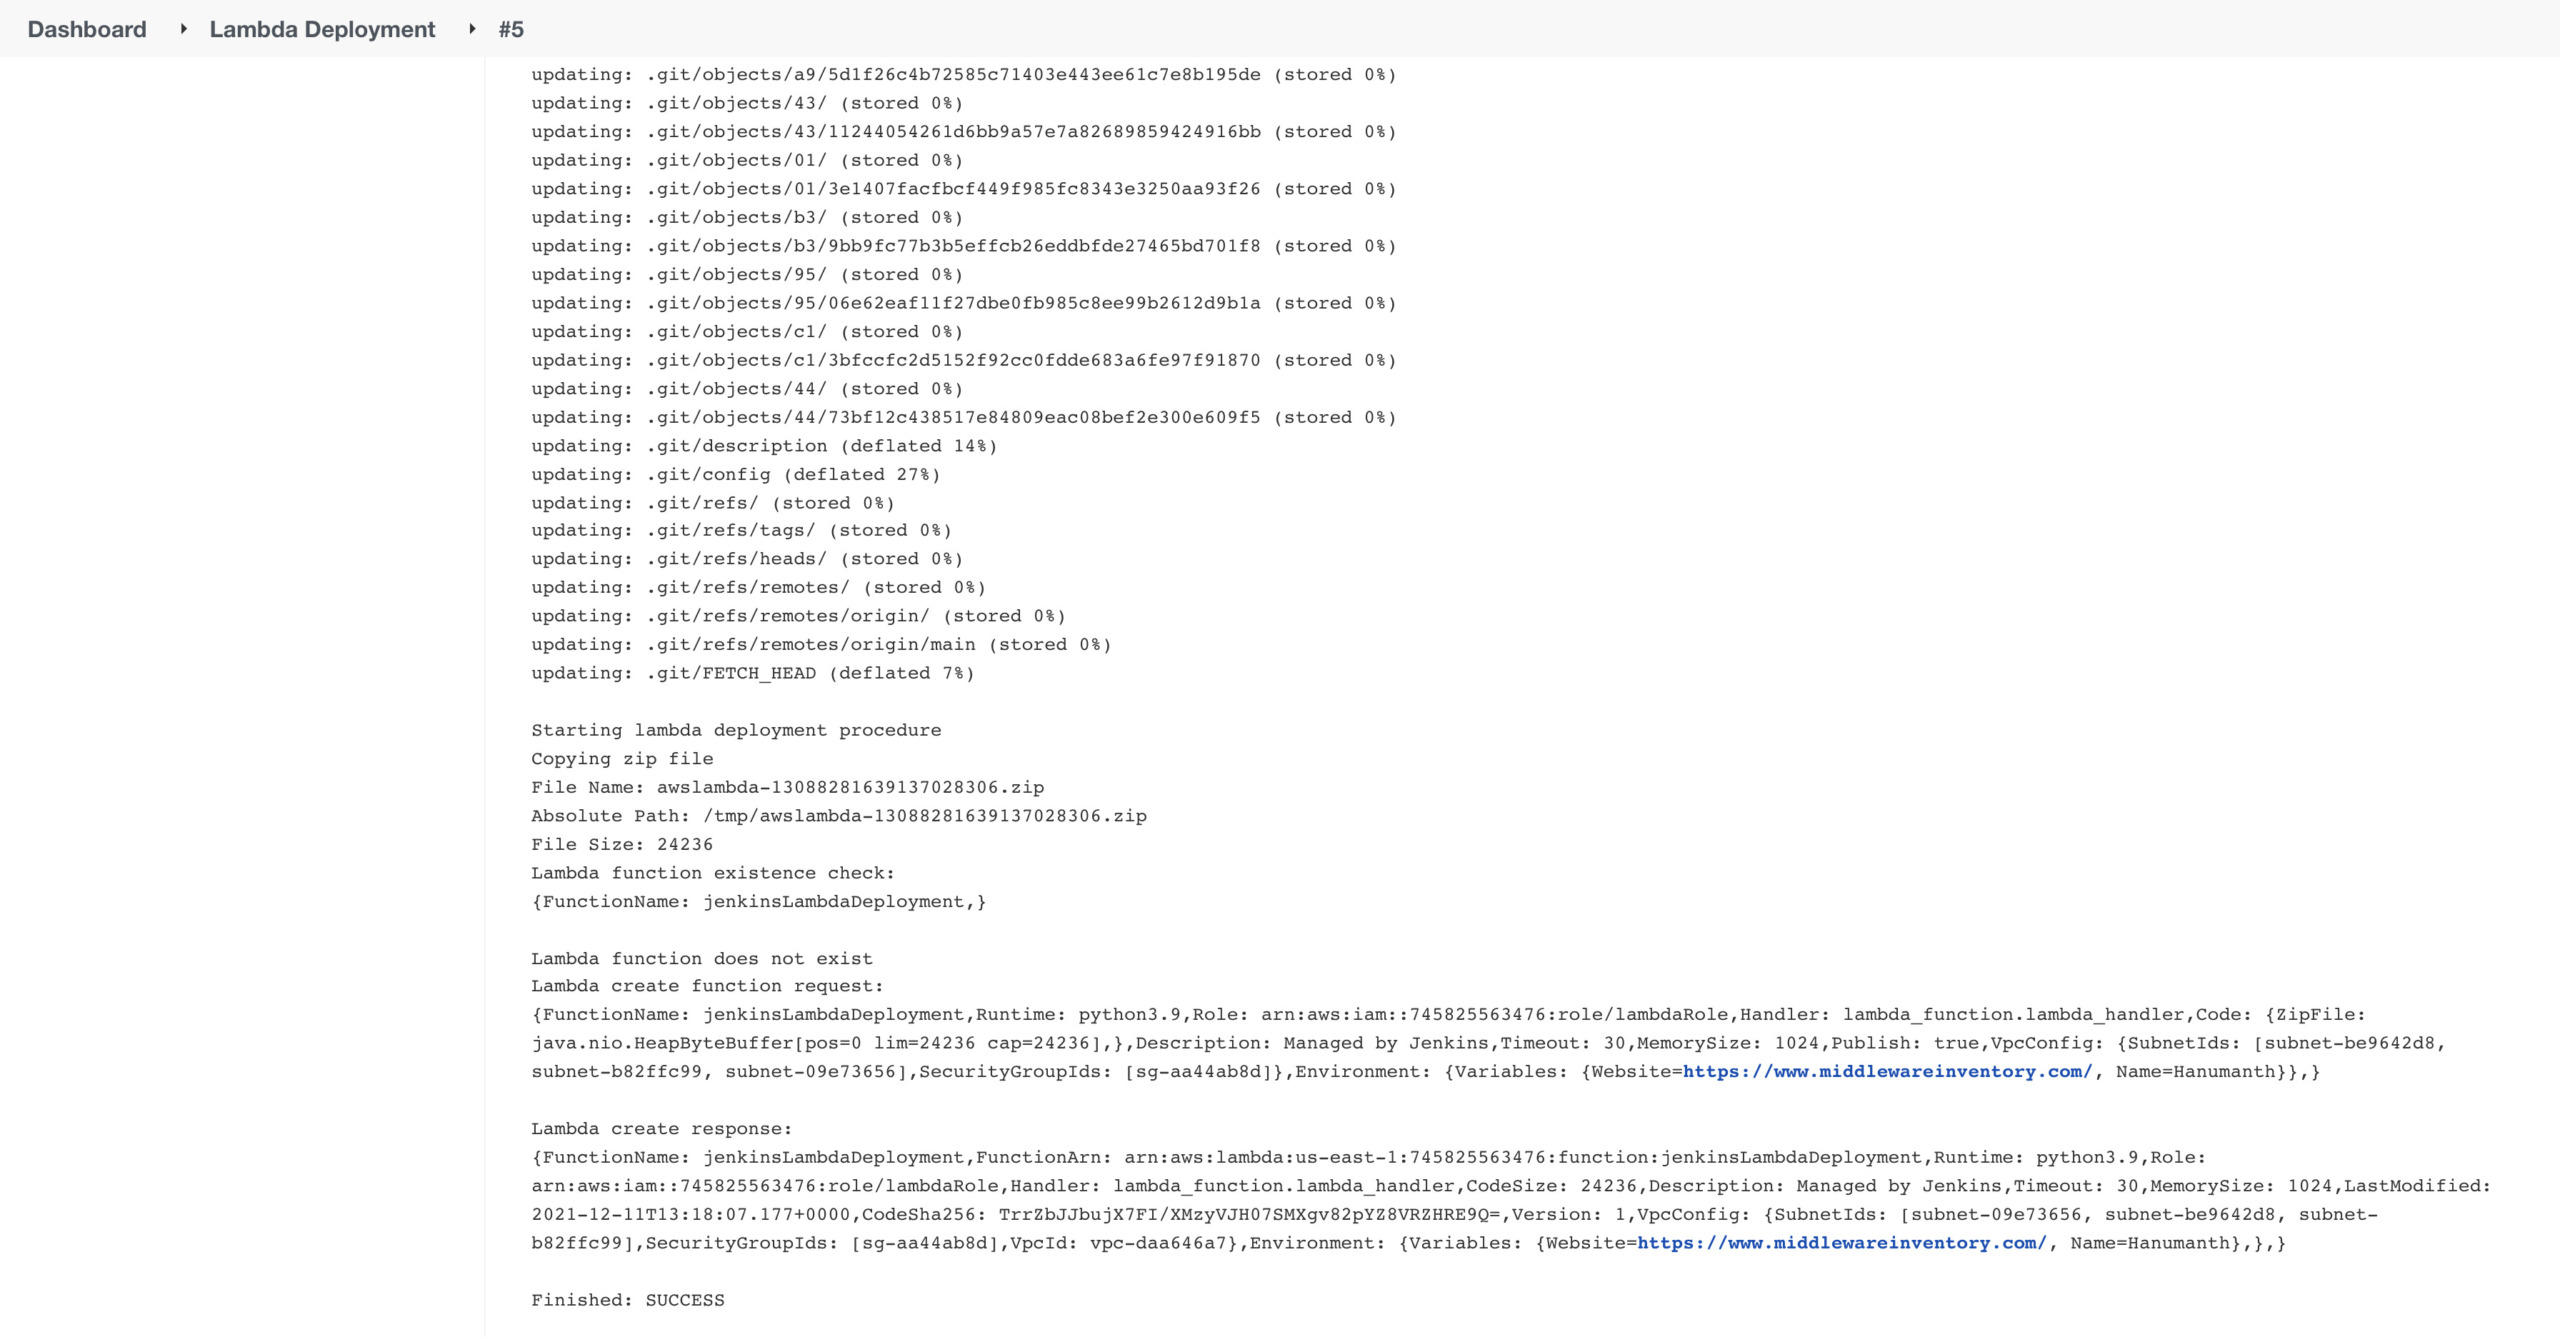
Click on the current build and click Console Output.
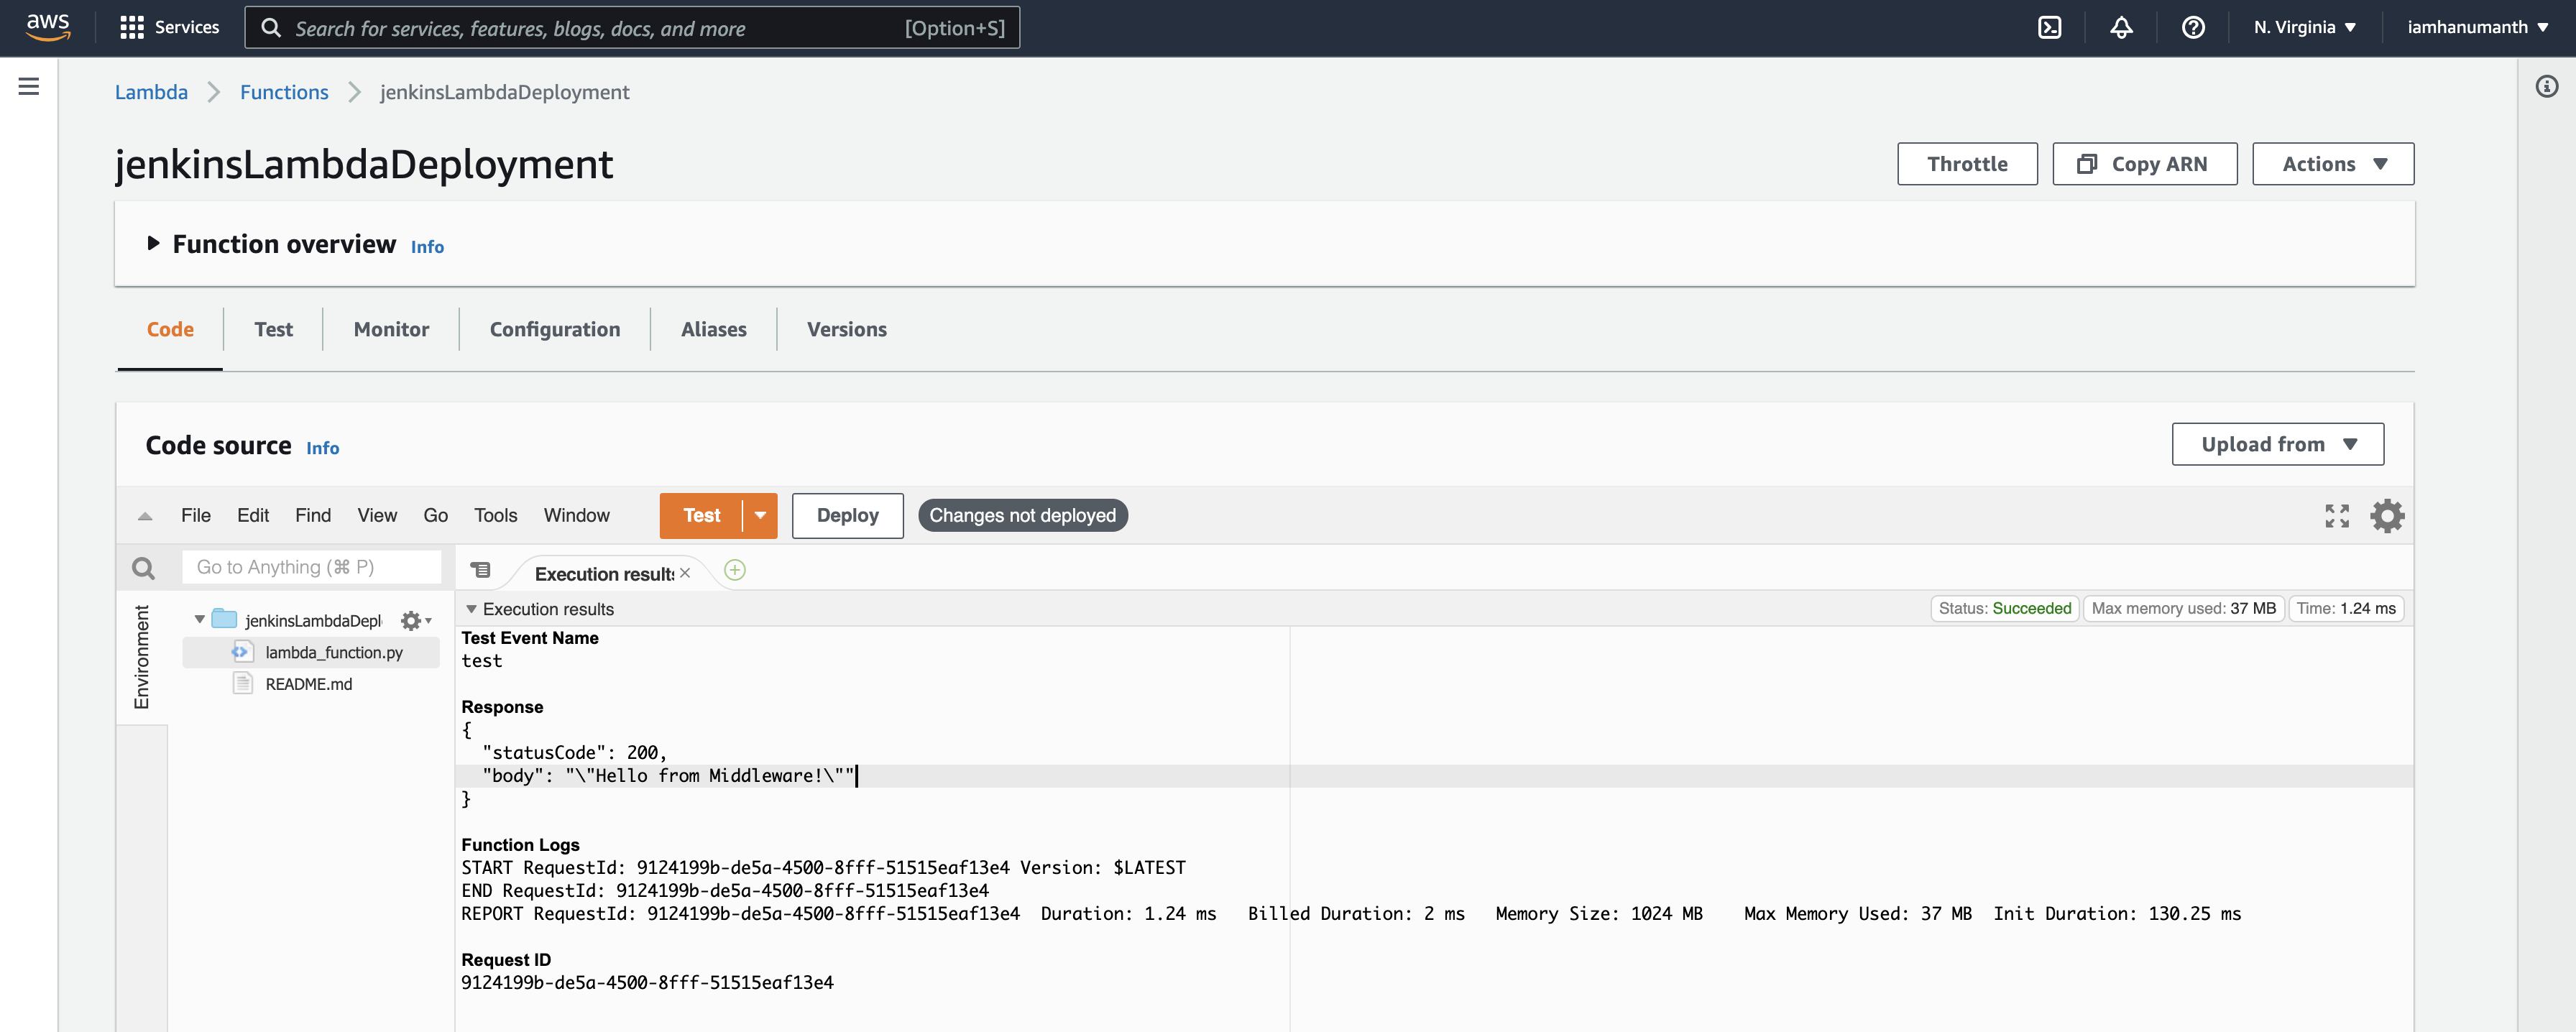
Upon successful build, your lambda function has the latest Code & Configuration.
That's all, you now have a functioning Jenkins Deployment Job in Jenkins.
If you have any feedback or best practices. please feel free to comment and let us know.
If you are new to Lambda try this article as well
Cheers
Hanumanth
Follow us on Facebook or Twitter For more practical videos and tutorials. Subscribe to our channel Find me on Linkedin My Profile For any Consultation or to hire us [email protected] If you like this article. Show your Support! Buy me a Coffee.
Signup for Exclusive "Subscriber-only" Content

