In this article we are going to see how to connect to remote hosts using Bastion host or Jump Server for Ansible playbook or Adhoc command execution.
In General, We know it is a an easy job to connect to remote hosts from Ansible control machine ( where you execute ansible playbook and ad hoc commands ) as it is agent less
As long as we have SSH Connectivity we are good.
When it comes to Enterprises we do not directly connect from our laptop (mac/windows) to the servers. For security reasons, we will first login to the Jump Server also known as Bastion host.
With SSH Forwarding machanism its possible you can login to the remote server directly by using the Bastion as a tunnell.
This Process is also known as ProxyJump in latest SSH versions. or SSH Forwarding in the technical terminologies.
Read more about ProxyJump here in this article https://www.redhat.com/sysadmin/ssh-proxy-bastion-proxyjump
Our Objective for this article is to talk about how to use Bastion host or Jump host as a medium and connect to our remote hosts.
with no further ado. Lets get to the topic
Overview
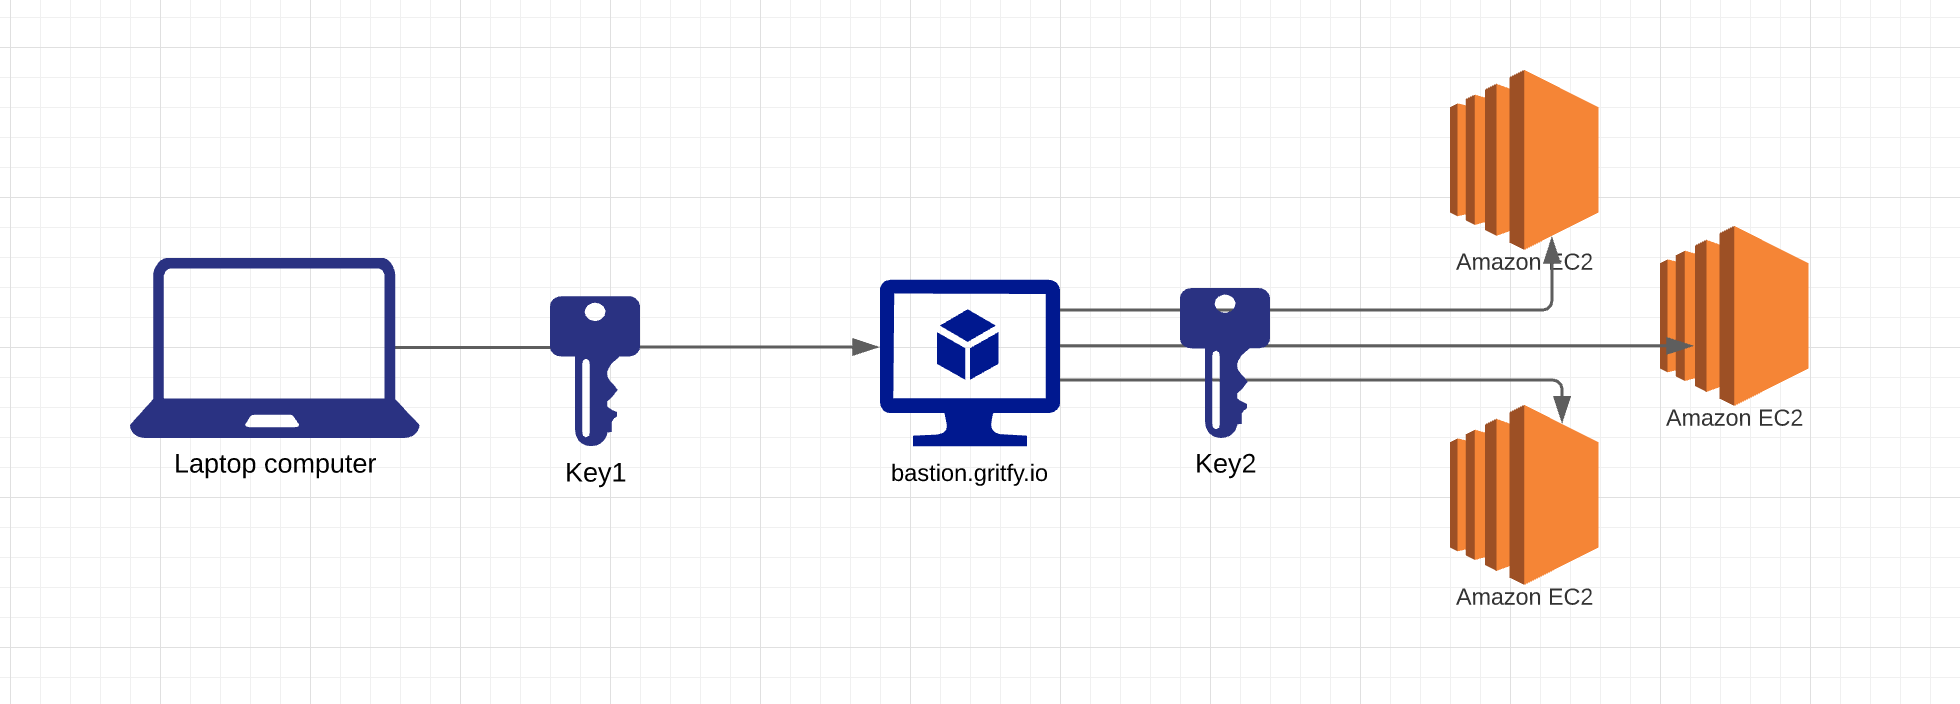
we are going to login to Bastion with our key and from there we would be using a different key to login to our EC2 linux instances. ( you can think of it as any regular linux )
So we are using two different keys here for enabling the SSH communication from my Laptop to the remote EC2 instances or hosts.
Ansible hosts file changes to use Bastion
Like anyother Ansible prerequisites we need to define our hosts under the hostgroup in the inventory file.
But this time with some extra parameters
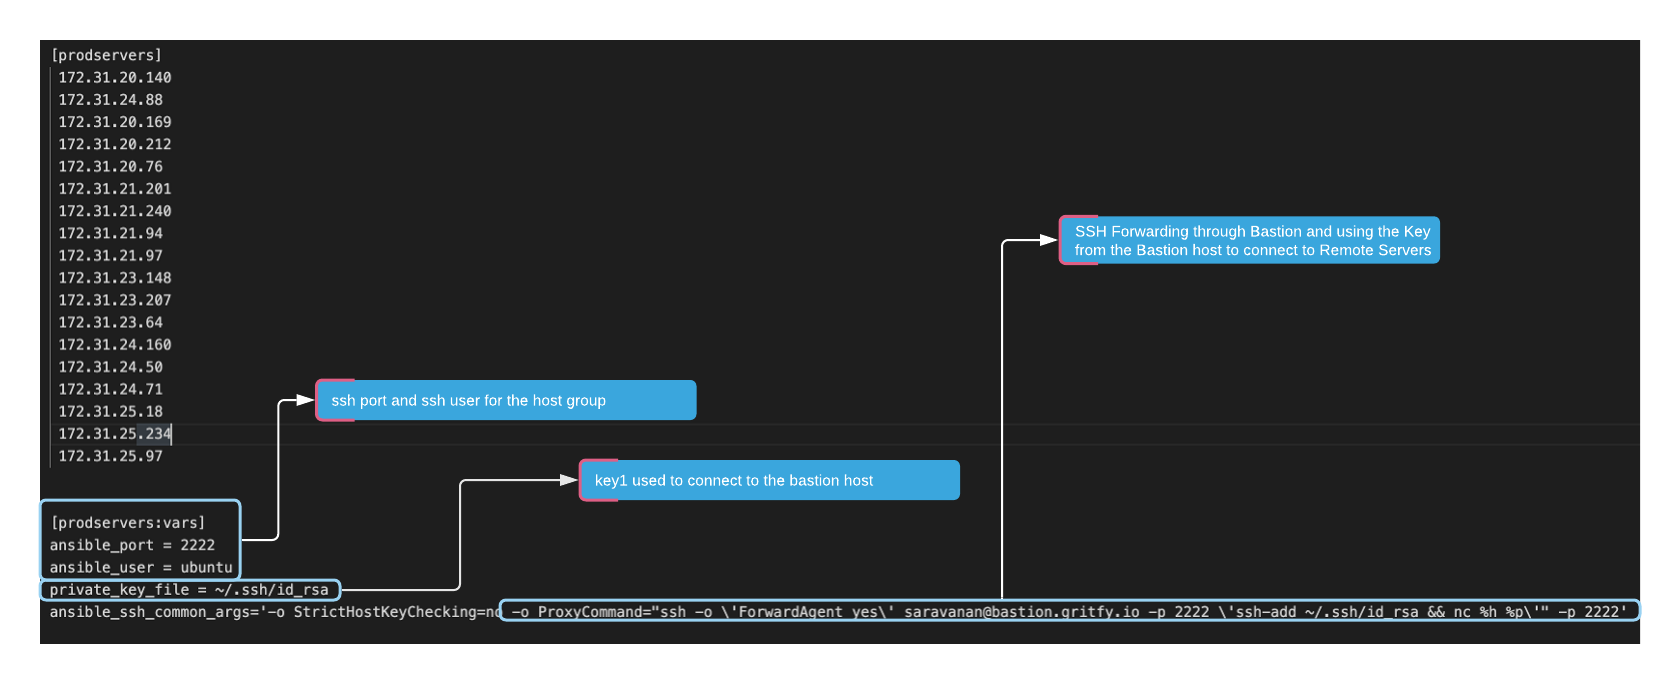
Here is the quick image of my inventory file, I have a hostgroup named prodservers and am defining some variables using prodservers:vars definition
There we are defining the SSH username for the bastion to ec2 servers which is ubuntu in my case
also I define the port to use for SSH, in my case it is 2222
this image would help you understand it little better.
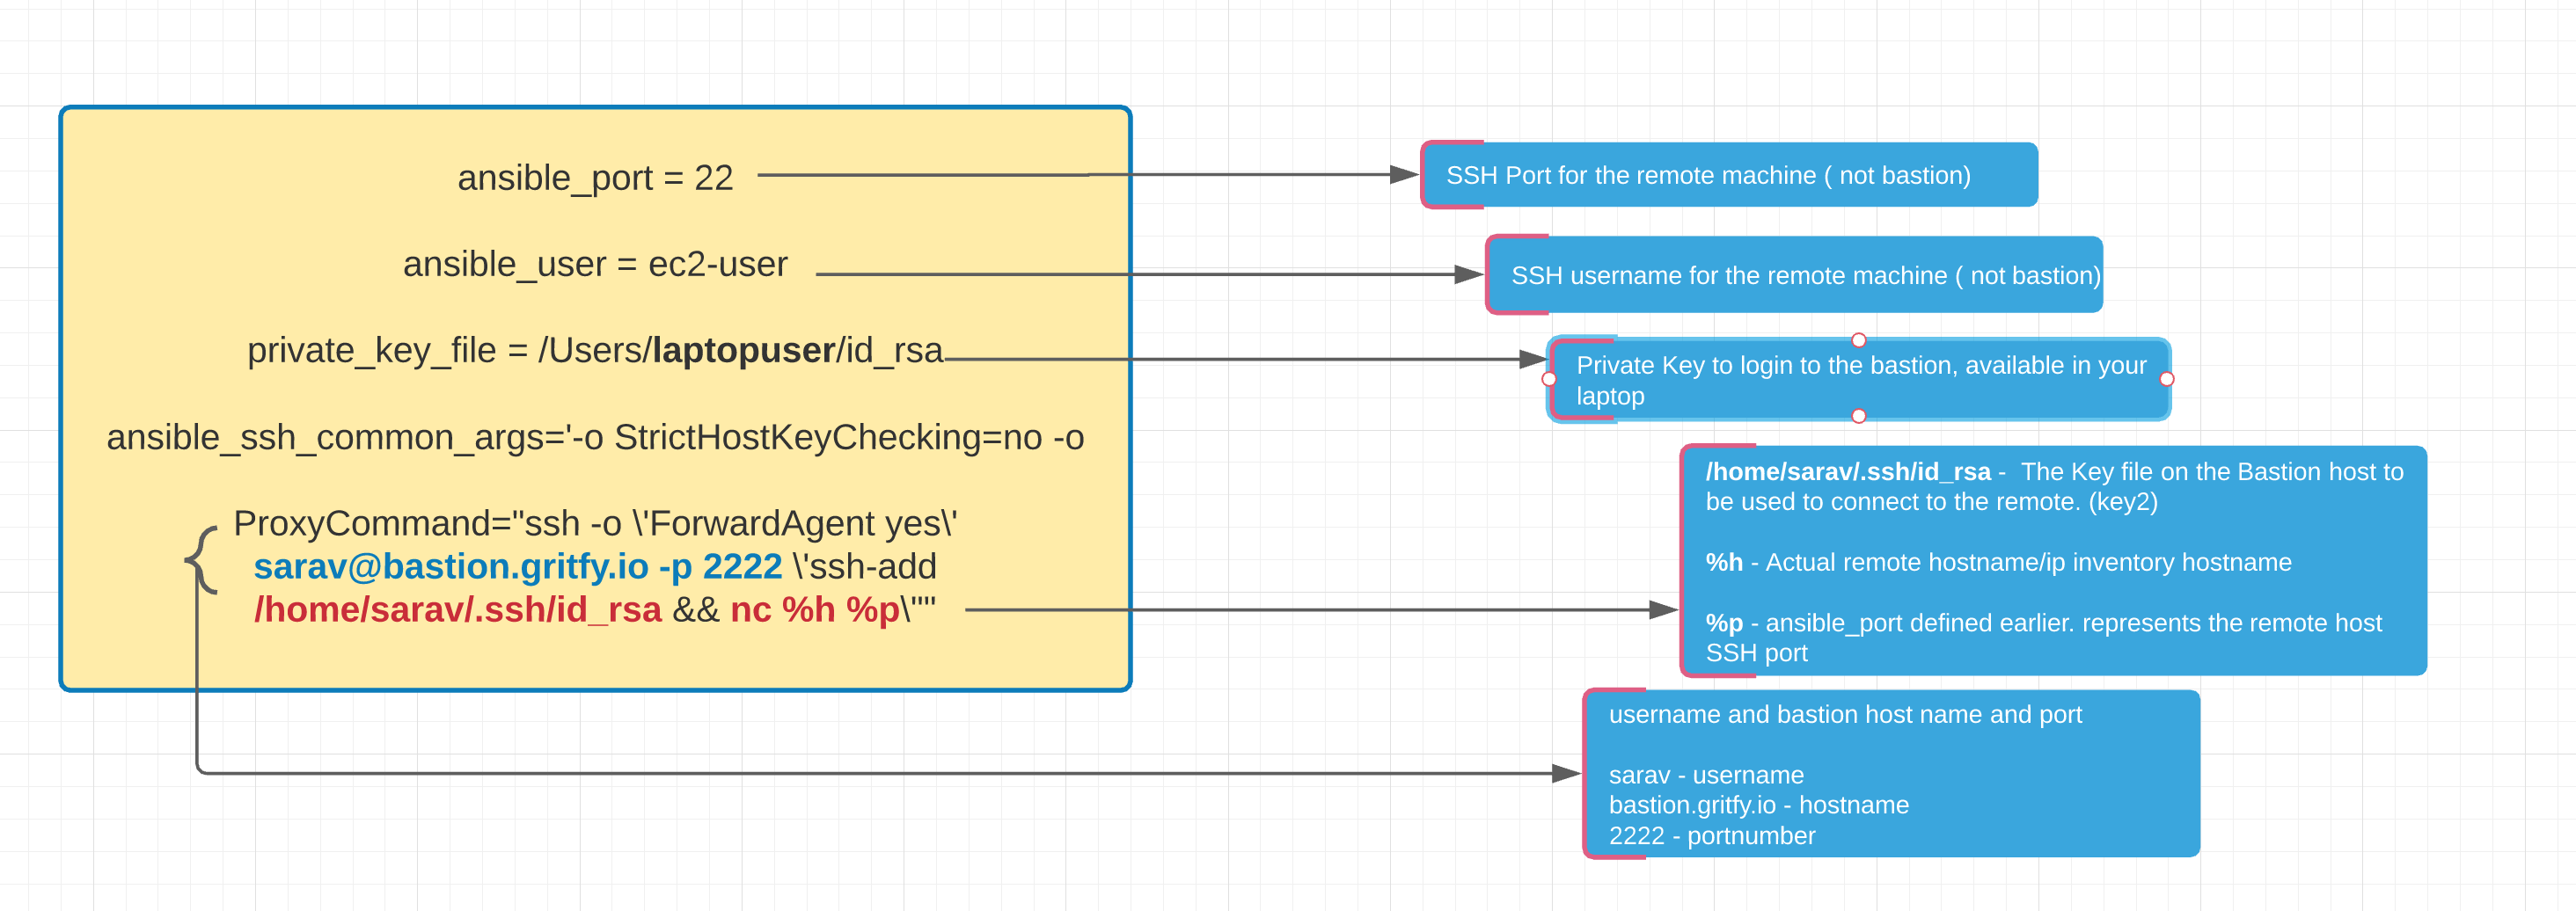
Let us see the arguments we are passing for the ansible_ssh_common_args in detail here.
We have given an explanatory image below and explained each arguments and their purpose.
For easy copying and to not mis-interpret the quotes, I have given the same as a plain text below.
[prodservers]
 192.31.70.140
 192.31.74.88
 192.31.70.169
 192.31.70.212
 192.31.70.76
 192.31.71.201
 192.31.71.240

[prodservers:vars]
ansible_port = 22
ansible_user = ec2-user
private_key_file = /Users/laptopuser/.ssh/id_rsa
ansible_ssh_common_args='-o StrictHostKeyChecking=no -o ProxyCommand="ssh -o \'ForwardAgent yes\' [email protected] -p 2222 \'ssh-add /home/sarav/.ssh/id_rsa && nc %h %p\'"'
and That's all, rest is as usual. you can go ahead execute some commands like ping to test your SSH connection
Validation
Now you are good to test it. I am going to use the ansible ping module to test the connecvity. If all goes well I can see the pong response from each remote hosts.
⇒ ansible -m ping prodservers -i ansible_hosts 2>/dev/null
192.31.24.88 | SUCCESS => {
    "ansible_facts": {
        "discovered_interpreter_python": "/usr/bin/python"
    },
    "changed": false,
    "ping": "pong"
}
192.31.20.169 | SUCCESS => {
    "ansible_facts": {
        "discovered_interpreter_python": "/usr/bin/python"
    },
    "changed": false,
    "ping": "pong"
}
192.31.20.76 | SUCCESS => {
    "ansible_facts": {
        "discovered_interpreter_python": "/usr/bin/python"
    },
    "changed": false,
    "ping": "pong"
}
192.31.20.212 | SUCCESS => {
    "ansible_facts": {
        "discovered_interpreter_python": "/usr/bin/python"
    },
    "changed": false,
    "ping": "pong"
}
192.31.20.140 | SUCCESS => {
    "ansible_facts": {
        "discovered_interpreter_python": "/usr/bin/python"
    },
    "changed": false,
    "ping": "pong"
}
Further Reading
So Now you are connected to your remote hosts and you can start automating and writing playbooks.
we have 100+ playbooks in DevopsJunction for you to start and practice with
Hope this helps and stay connected to DevopsJunction.
Cheers
Sarav AK

Follow me on Linkedin My Profile Follow DevopsJunction onFacebook orTwitter For more practical videos and tutorials. Subscribe to our channel
Signup for Exclusive "Subscriber-only" Content


